Showing posts with label patterns. Show all posts

Friday, July 26, 2019

Old Pattern...New Price

Like the title says... Old Pattern, new price. I've decided to make some changes with the blog. So I'm starting here. The Beaded Bikini pattern will now be offered FREE


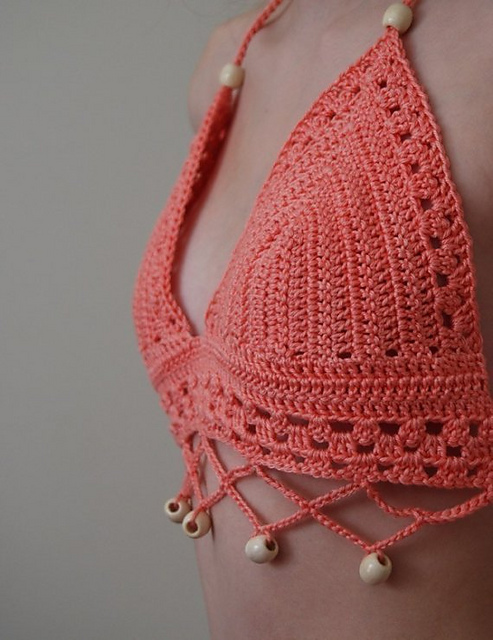
This bikini top is crocheted using cotton yarn which provides a great fit and coverage. The sturdy design allows for wear in and out of the water. The pattern includes instructions for two styles which are pictured. 


Materials
 Tahki Cotton Classic yarn or any light weight cotton Approximately 2 oz. or 175 yds.

Size D crochet hook
Beads of your choice 
12 beads for peach style A or B cup, 13 beads for C cup
13 beads for brown style A or B cup, 14 beads for C cup 
Yarn needle

Gauge
11 dc and 6 rows = 2”

Stitches 
Sc: single crochet
Dc: double crochet
Sl St: slip stitch
Ch: chain

Notes
Do not crochet loosely. The firmness of the stitches creates the sturdy texture of the top. 

Pattern

Size A and B Cups (Make 2)
Work in rows. The first Ch 3 counts as a dc. 
Ch 14.

Row 1: Dc in the 4th ch from hook. Dc in next 9 ch sts. (2 dc, ch1, 2 dc) in remaining ch st. Working in other side of beginning chain, dc in each ch st to the end (26 dc and 1 ch-1 space). Turn

Row 2: Ch 3. Dc in each st to the ch-1 sp. (2 dc, ch 1, 2 dc) in ch 1 sp. Dc in each st to the end of the row (30 dc and 1 ch-1 sp). Turn

Size A Cup

Rows 3-7: Repeat Row 2 (50 dc and 1 ch-1 space). Turn

Row 8: Ch 3, Dc into first st (the st which is usually replaced by the ch 3). (Ch 1, skip 2 sts, 3 dc in next st) 7 times. Ch 1, skip next 3 dc, (3dc, ch 1, 3 dc) in ch-1 sp. (Ch 1, skip next 2 sts, 3 dc in next st) 7 times. Ch 1, skip next 2 sts, 2dc in last st. Turn.

Row 9: Ch 3. Dc in first st. 3 dc in each ch 1 sp to the top of the cup.
(Note: You will not ch 1 between each 3 dc for this row).
3 dc, ch 85, sl st in 2nd ch from hook. Sl st into each ch, working your way back to the top of the cup (this forms the strap). 3 dc in top of cup. (3 dc in next ch-1 sp) across. 2 dc in last st.

Size B Cup                                                        

Rows 3-8: Repeat Row 2 (54 dc and 1 ch-1 space). Turn

Row 9: Ch 3, Dc in next 2 sts. (Ch 1, Skip next 2 st, 3 dc in next st) to the last 3 dc before the ch 1 sp. (3dc, ch1, 3 dc) in ch-1 sp. Ch 1, skip next 3 sts, 3 dc in next st. (Ch 1, skip next 2 sts, 3 dc in next st) 6 times. Ch 1, skip next 2 sts. Dc in last 3 sts. Turn.

Row 10: Ch 3. Dc in first st. Skip next 2 dc. (3 dc in each ch-1 sp) across to the top of the cup. (Note: You will not ch 1 between each 3 dc for this row). 3 dc, ch 88, sl st in 2nd st from hook. Sl st into each chain, working your way back to the top of the cup (this forms the strap). 3 dc in same sp as last 3 dc. (3 dc in next ch-1 sp) 8 times. Skip next 2 sts and place 2 dc in last st. 
Note: This is the last row of the cup and is considered the right side.


Size C Cup
Ch 16

Row 1: Dc in 4th chain from hook. Dc in next 11 ch. (2 dc, ch 1, 2 dc) in last ch. Working in opposite side of beginning ch, dc in each ch (30 dc and 1 ch-1 sp). Turn.
Row 2: Ch 3. Dc in each st to the ch-1 sp. (2 dc, ch 1, 2 dc) in ch-1 sp. Dc in each st to the end of the row (34 dc and 1 ch-1 sp). Turn.

Rows 3- 9: Repeat row 2 (62 dc and 1 ch-1 sp). Turn.

Row 10: Ch 3, dc in next st, skip next 2 sts, 3 dc in next st. Ch 1, skip 2 sts, 3 dc in next st) 8 times. Ch 1, skip 2 sts, (3 dc, ch 1, 3 dc) in ch-1 sp. (Ch 1, skip next 2 st, 3 dc in next st) 9 times. Skip next 2 sts, dc in last 2 sts. Turn.

Row 11: Ch 3. 3 dc in first ch-1 sp. (3 dc in next ch-1 sp) across to ch-1 sp at the top of cup. (Note: You will not ch 1 between each 3 dc in this row) Ch 95, sl st in 2nd st from hook. Sl st across to last ch (this forms the strap). 3 dc in top of cup in same st as previous 3 dc made. (3 dc in next ch-1 sp) across to end of row. Dc in last st.
Note: This is the last row of the cup and is considered the right side.


All sizes
After completing the 2nd cup do not finish off. Turn both cups with the top of the cups pointing down and right side facing.  Now you will begin to work the rows on the bottom.

Sizes A and B

Row 1: Ch 3.
Work 40 dc evenly across the bottom of the cup. Ch 3, attaching the other cup, work 40 dc evenly across the bottom of the other cup. (80 dc and 3 ch) Turn.

Rows 2-3: Ch 3, dc in each st across (83 dc). Turn.

Row 4: Ch 3, dc in first st. Ch 1, skip next 2 sts, 3 dc in next st. (Ch 1, skip next 3 sts. 3 dc in next st.) across to last  2 sts. Ch 1, skip next st, 2 dc in last st. Turn.

Row 5: Ch 3, 2 dc in first ch 1 sp. (Ch 1, 3 dc in each ch 1 sp) across to the last ch 1 sp. Ch 1, 2 dc in last ch 1 space, dc in last st. Turn.

Row 6: Ch 3, dc in first st (same st with ch 3). (Ch 1, 3 dc in next ch-1 sp) across to last ch-1 sp. Ch 1, 2 dc in last st. Finish off.

If making the style of the peach top

String 6 beads onto yarn.

Row 7: With wrong side facing attach with sl st to the 2nd dc. Sc in same st. (Ch 15, skip 11 sts, sc in next st) across. (8 sc and 7 ch-15 sp). Turn,

Row 8: Sl st over to the middle of the first ch-15 sp which is the 8th ch. (Ch 7, slide up bead and ch 1 to secure, ch 7. Sc into 8th chain of next ch-15 sp) across. Finish off. 

If making the style of the tan/ brown top

String 7 beads onto yarn.

Row 7: With wrong side facing attach with sl st to the 2nd dc. Sc in the same st. (Ch 7, slide bead up, ch 1 to secure, ch 7, skip next 11 sts, sc in next st) across (8 sc and 7 ch-15 sp). Finish off.


Size C cup

Row 1: Ch 3. Work 45 dc evenly across the bottom of the cup. Ch 5, attaching the other cup, work 45 dc evenly across the bottom of the other cup. Turn.

Row 2-4: Ch 3. Work dc in each st across (95 dc). Turn.

Row 5: Ch 3. Dc in first dc (same st with ch 3). Ch 1, Skip next 2 sts, 3 dc in next st. (Ch 1, skip next 3 sts, 3 dc in next st) across to last 3 sts. Ch 1, Skip next 2 sts, 2 dc in last st. Turn.

Row 6: Ch 3. 2 dc in first ch-1 sp. (Ch 1, 3 dc in next ch-1 sp) across to last ch-1 sp. Ch 1, 2 dc in last ch-1 sp, dc in last st. Turn.

Row 7: Ch 3. Dc in first st. (Ch 1, 3 dc in next ch-1 sp) across to last ch-1 sp. Ch 1, 2 dc in last st. Finish off.

If making the style of the peach top

String 7 beads onto yarn.

Row 8: With wrong side facing attach with sl st to the first st. Sc in same st. (Ch 15, skip 11 sts, sc in next st) across. (9sc and 8 ch-15 sp). Turn. 

Row 9: Sl st over to the middle of the first ch-15 sp, which is the 8th ch. (Ch 7, slide up bead and ch 1 over the bead to secure, ch 7. Sc into the 8th ch of next ch-15 sp) across. Finish off

If making the style of the tan/brown bikini 

Slide 8 beads for C cup onto yarn.

Row 8: With wrong side facing attach with sl st to the first st. Sc in the same st. (Ch 7, slide up bead and ch 1 over the to secure, ch 7. skip 11 sts, sc in next st) across (9 sc and 8 ch-15 sp). Finish off.


Strap/ tie for the back

Ch 298
Sl st in 2nd ch from hook, and in each ch across to end. Finish off. Weave through row 5 for sizes A and B and row 6 for size C cup (or row of your choice).
Weave all ends and slide beads onto ends each strap and tie knot to secure. (refer to the photos)


Please notify me if any corrections need to be made. Feel free to contact me with any suggestions. If you need any help with the instructions I will be happy to help. You can sell items made from this pattern in your shop as long as you provide a link back to me or this design. 

I'm working on linking this pattern to a document you can download. In the meantime just copy and paste into a document if you need to print.

Over the next few weeks I'll be working on the blog. I'm in the process of switching over to Word Press. I may regret it, but I hope not. I find that a lot of my photos and content are slow to load and response time is a killer. A wise internet/ computer person informed me that blogger can be limited with lots of content. Or it could be user error. Any ideas are welcome.

I've also joined Bloglovin... Follow my blog with Bloglovin

 I'm behind in the blogging world. But I'll try to do better in the future.

Have a great weekend!

Sunday, November 11, 2018

Wow... It’s Been Over A Year

It’s hard to believe I haven’t posted anything in over a year and a half. Last year was a truly miserable one. This one has been some better. It’s been busy as usual and I just wasn’t feeling blogging. It has been at the bottom of my list for a long time now. For a long time I didn’t crochet or knit...it didn’t interest me at all. I still lead a Girl Scout troop and work full time of course...so that’s taken every ounce of energy I have. Also, my beloved geriatric Sony Vaio laptop crashed. It was my fault because I loaded so much onto that thing. So blogging on my phone (which I’m doing now) didn’t appeal to me at all. Now I feel the need to share again. Recently I started knitting hats after a request from a coworker. That reminded me of how much I needed it. I’m also crocheting Christmas baubles. At work every year our facility holds an awesome two day Christmas craft fair. At first we thought we were going to cancel because we weren’t ready. But instead of canceling, lots of staff and residents are pitching in to create items to sell. So I’m painting a couple ceramic pieces and crocheting the baubles.


I’ve made seven so far with a goal of about twenty. I think I can get them done in time. I used Pinterest to lead me to the patterns. The red, white and green one can be found here. The red, yellow, pink and purple one can be found here. The tiny stocking pattern can be found here

I’ve starting painting these ceramics which were donated to the facility by a resident’s family member. It’s a slow process considering I’m somewhat of a perfectionist. I’m turning the owl into a planter for a succulent or other plant of some kind.


I have to say this post has frustrated me since it’s taken over an hour to do on my phone. Maybe before long I can get a new laptop or iPad to use. 

I hope you all have a happy Sunday. I’ll be back in a few days...since I have plans for another post next Sunday. 

It’s good to be back,
Liz


Sunday, December 13, 2015

Big Hook Rag Crochet Give away

A few weeks ago I mentioned a give away. I am giving away a copy of this


Big Hook Rag Crochet includes one of my patterns... a basket. Inside you will also find other patterns for projects using different types of fabric. I made the basket using T shirts.


I took a few photos of the contents pages so you could see a little preview of the other patterns included


If you would like to receive this book for free, then just leave me a comment. You don't have to say a whole lot or share on Facebook, Instagram or any other site. Easy!


I'll randomly select the winner in one week (next Sunday). See you then!

Saturday, January 25, 2014

What I've Been Working On

I just realized that it's been almost two months since I've posted anything crochet related. I've started about five new projects and finished about three...not so bad.
Julia Vaconsin's Basic Mitts

I also completed a South Bay Shawl in the Red Heart Unforgettable. I think this is the Winery colorway.?
It needs blocking and better photos

This is my latest...
the dreaded Noro
I am proud of myself because I have waited two years to use this yarn again. This time I am using the Taiyo sock in the S9 colorway from Knotanotherhat. I just couldn't resist. This will be another Elise. One of these days I will come up with a shawl pattern. It's just hard to beat the Elise pattern, but I am getting pretty burned out on it.

To find these patterns just click on the links in blue.

Saturday, August 17, 2013

Chunky Crocheted Tote Pattern


I made this bag in one day. I love instant gratification projects. I'm going to make about 3 more. They're so easy and take very little brain power...my kind of project.


Materials
Super Bulky yarn (2-2.5 skeins) I used Lion Brand Thick and Quick in charcoal
Size K and L crochet hooks
Yarn needle

Measurements
14 inches (36mm) in height
20 inches (51mm) in height (including handles)
15 inches (38mm) in width (lying flat)

Note
The bottom of the bag is worked in rows, forming a square

Pattern

With K hook Ch 17

Row 1: Sc in 2nd ch from hook, sc in each ch to the end. (16 sc)
Rows 2-17: Ch 1, sc in each st across. (16 sc)

You will now begin working in the round. Do not turn your work

Round 1: Working down the side, place sc in the ends of each row. I put 2 sc in each corner. Work sc across the row, then back up the other side of the work. Place sc in each st across the top. You should end with 68 sc. 
Rnd 2: Working in the back loop, place sc in each st around. Do not join. Do not turn.
Now switch to the L hook
Rnd 3-31: Working in both loops, sc in each st around.

To determine where to end, I layed the work flat and lined up the corner of the bottom


The next round will form the handles

Rnd 32: Ch 35, skip the next 17 sts, sc in the next 17 sts, ch 35, skip 17 sts, sc in next 17 sts. Do not join.


Rnd 33: Sc in back ridge of each ch, sc in next 17 sts, sc in back ridge of each ch, sc in next 17 sts. Join using invisible join method.

Weave all of the ends...and you're done.


I like the shape of the bottom because the shape of the bag changes depending on how much stuff you put in the bag. It can be oval, round, or square.

It's so easy to make the size larger. All you do is add more rows. To add to the width just make the bottom larger by adding stitches and rows. Just make sure if you expand the pattern, increase the stitch count in between the handles. Just play around with it, and don't fret, crochet is so easy to rip out and redo. This bag is so quick, messing up won't slow you down much at all.

Remember to line up your handles so they are centered with the bottom. (look at the photo above)

Please let me know if you have any questions, or if I need to correct any typos or mistakes.
(I wrote this up fast)

Have a great weekend!

Monday, December 17, 2012

Heather's Sock Monkey Hat

A few weeks ago, Heather from Pass the Cereal made this Sock Monkey Hat. Somehow I missed it. Isn't it the cutest thing? I just had to share it.


Heather did so great with this hat. I think it looks better than the original. I may have to copy hers...hahaha


I love it...these photos are just adorable. I want to make another one now:)

You can find the pattern for this hat here.


Monday, October 8, 2012

The Pink Panda

Finally...I know, I know. I keep promising this pattern, but life seems to get in the way.


Materials
Worsted weight yarn (pink, black, & white)
You'll need less than 3.5 oz of pink and small amounts of black and white
Size H crochet hook
Yarn needle
2 black buttons

Size
Fits a child, teen, or small adult head
I made this hat for a 6 year old and it barely fits my head. (I have a pretty small head)


Note: For this pattern I did not join each round. I hate the seam, so I just kept going around. You may need to mark the first stitch to keep track of the ending/beginning of each round.


Pattern

With Pink, ch 3

Rnd 1: Work 7 hdc in 3rd chain from hook. (8 hdc) The first 2 chains as a stitch. Do not join.

Rnd 2: Work 2 hdc in each st. (16 hdc)

Rnd 3: Work (1 hdc in next st, 2 hdc in next st) around. (24 hdc)

Rnd 4: Work (hdc in next 2 sts, 2 hdc in next st) around. (32 hdc)

Rnd 5: Work (hdc in next 3 sts, 2 hdc in next st) around. (40 hdc)

Rnd 6: Work (hdc in next 4 sts, 2 hdc in next st) around. (48 hdc)

Rnd 7: Work (hdc in next 5 sts, 2 hdc in next st) around. (56 hdc)

Rnd 8: Work (hdc in next 6 sts, 2 hdc in next st) around. (64 hdc)

Rnds 9-17: Work hdc in each st around. On the last rnd you will finish off. I worked a sc then sl st in the last two sts, just to prevent seeing a really pronounced finish.
(If you are using the same color for the ear flap don't worry about the sc and sl st.)

First Ear flap

Holding the hat with right side facing, attach Black yarn with sl st. 

Row 1: Ch 1 and work sc in same st. Sc in next 16 sts. (17 sc) Ch 1, turn. 

Row 2: Sc2tog over the first 2 sts, sc in each st across. Ch 1, turn. (16 sc)

Row 3: Repeat row 2, until 1 st remains. Finish off.


Second Ear flap

Skip next 17 sts and attach Black yarn with sl st. Repeat instructions for first ear flap.

I did not crochet an edging for this hat. I like the way it looks without one.


Finish off, leaving a tail long enough to use in the braid. (12 inches or so) I really hate weaving ends when I don't have to:D


Ears

* You will hold two strands of yarn together. This makes the ear thicker and stand up better *

With Black yarn, Ch 4

Row 1: 7 dc in the 4th chain from hook (8 dc) TURN

Row 2: Ch 2, hdc in the first st and next st, (2 hdc in next st, hdc in next st) 3 times. (12 hdc)

Finish off leaving a tail long enough to sew onto the hat.

Nose

With Black yarn, Ch 5

Row 1: Sc in 2nd ch from hook and in next 3 sts. (4sts) Turn

Row 2: Sc2tog twice (2 sts) Turn

Row 3: Sc2tog. Finish off leaving tail long enough to sew nose to the hat.


Eyes

With White yarn, ch 2

Rnd 1: 6 sc in 2nd chain from hook.

Rnd 2: 2 sc in each st, finish off. (12 sc)

This will be your inner eye, where you will sew the buttons

Outer Eye Spots

Don't fret over the stitches. If you find that you are off by a stitch, it will be ok as long as you end up with an oval shape. Work these spots in a continuous oval. Do not join after each round.

With Black Ch 4

Rnd 1: 2 sc in 2nd ch from hook, sc in next st, 4 sc in last st. Rotate, working into the other side of the chain. Sc in next 2 sts. Do not join.

Rnd 2: 2 sc in each of the next 2 sts, sc in next 2 sts, 2 sc in each of the next 3 sts, sc in next 3 sc.

Rnd 3: 2 sc in next 3 sts, sc in next 4 sts, 2 sc in next 2 sts, sc in next 6 sts.

Rnd 4: 2 hdc in next 3 sts, sc in next 7 sts, 2 sc in next 3 sts, sc in next 7 sts.

Rnd 5: Hdc in next st, 2 hdc in next 3 sts, hdc in next st, sc in nexxt 8 sts, 2 sc in next 3 sts, sc in next 9 sts. Finish off using no knot method. Leave a tail long enough to sew to face.

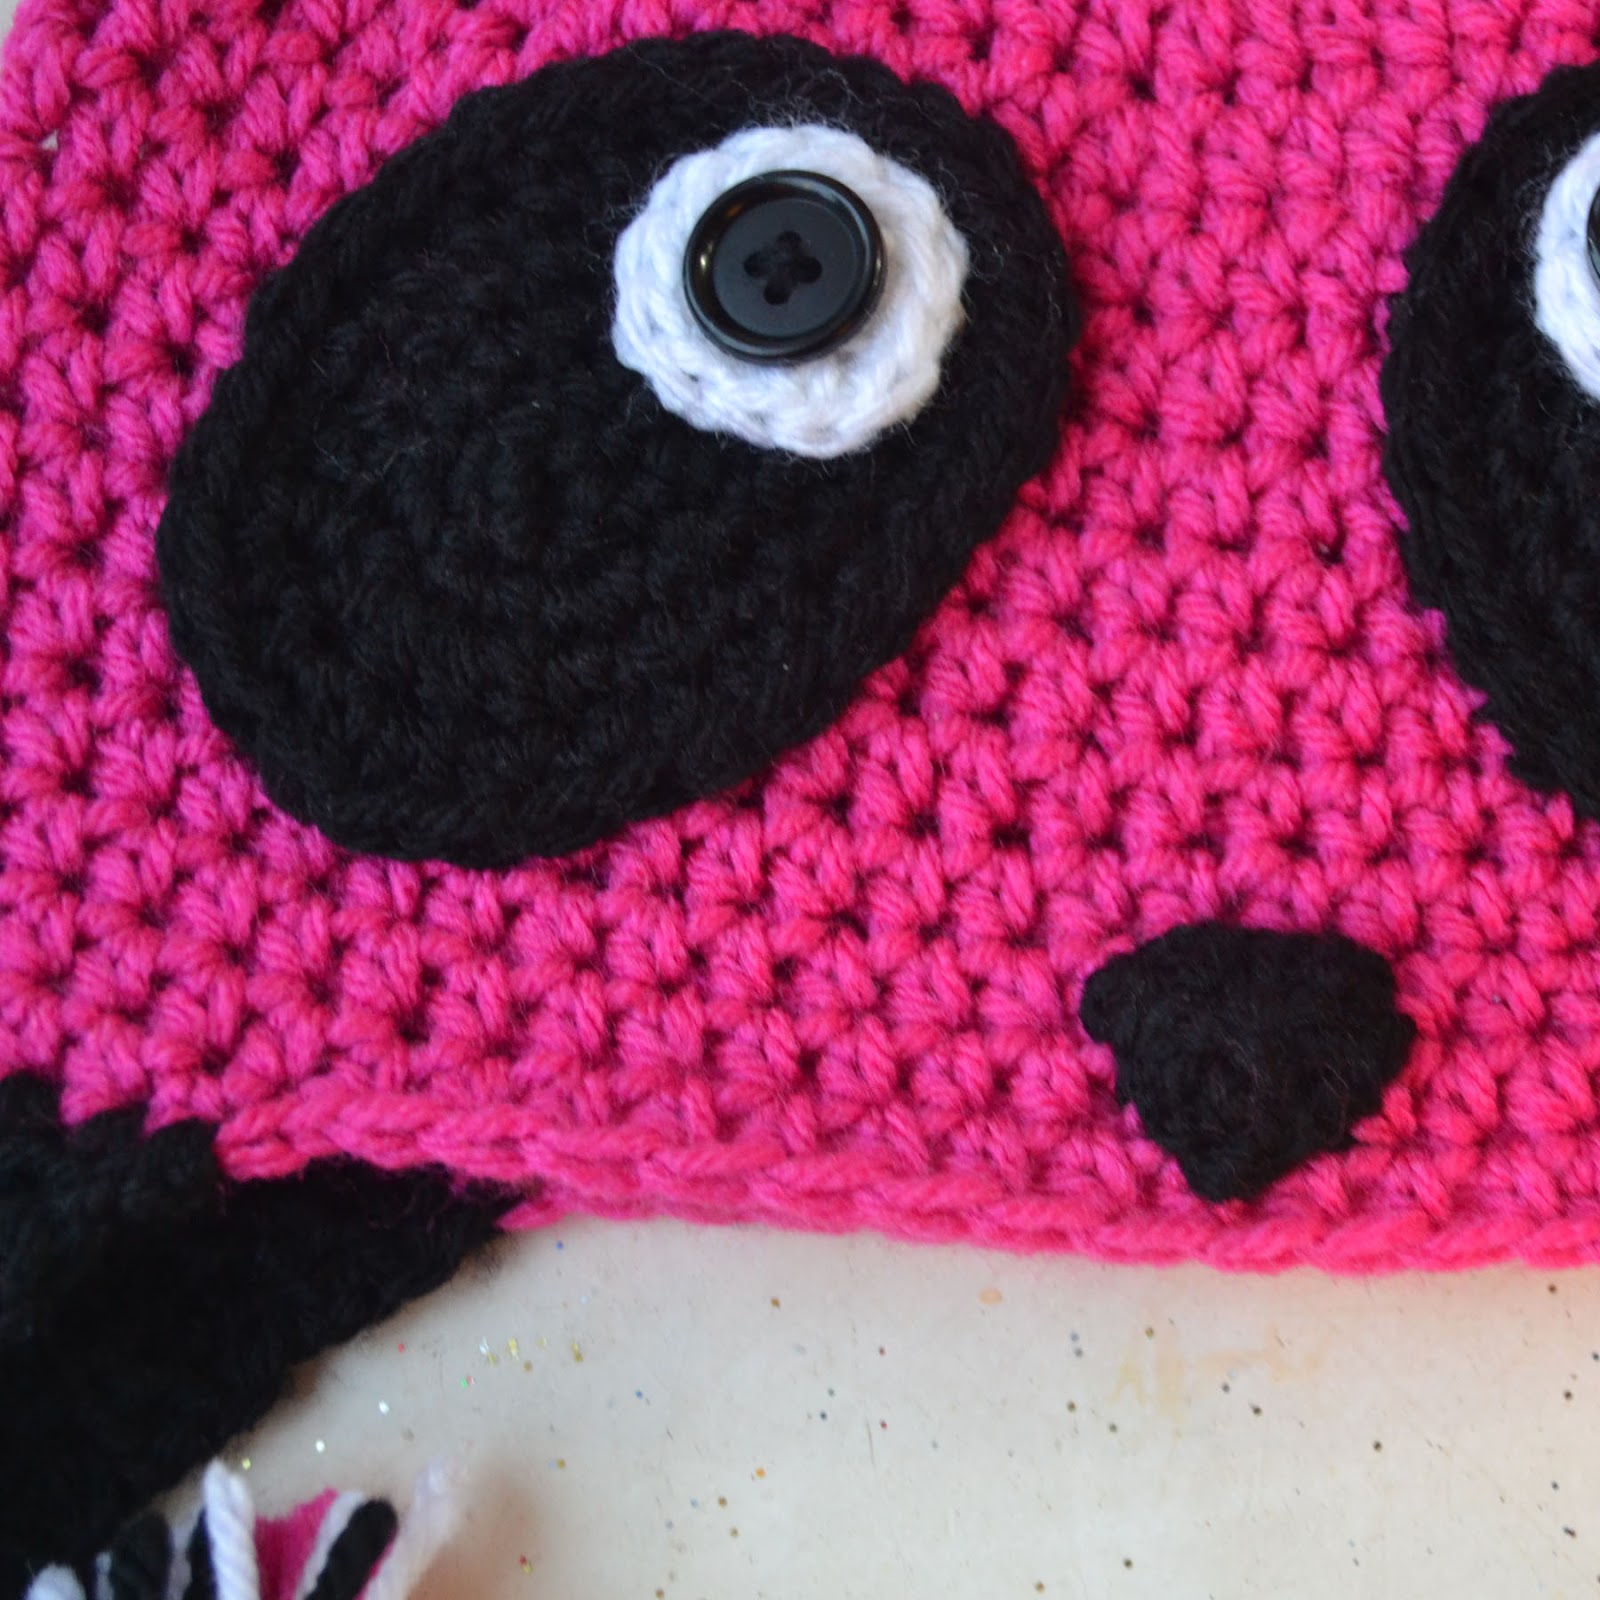
Sew the inner eyes onto the outer eye spots, referring to the photos. Then sew the entire eye spot to the hat. Try to place the spots more vertical than horizontal. Mine may be a touch too horizontal.  To me, this makes the face look like a raccoon (maybe I've been looking at the face for too long now;D)

As always, remember to sew through the top layer of the stitch on the hat. Don't go completely through to the inside, this will make the inside of the hat look messy.


Braids

I used Black, Pink, and White

Cut 10 strands of each color. You'll use 5 strands of each color for each earflap.


Please let me know if you find a typo or mistake. I'll gladly correct it. I'll take better photos tomorrow and hopefully Ireland will cooperate.

Don't forget to show me your finished Pandas...I'd love to share them.

Sunday, July 8, 2012

The Tornado Twister

I was so excited on Friday to check the mail and receive my copy of the pattern that I designed for Spud and Chloe. It is a multicolored, crocheted cowl.


This is the project that I blogged about a few months ago. I'm so happy that you now get to see what I was creating. Spud and Chloe have named it Tornado Twister. I love the name and how it turned out in print. 


I received a copy of the pattern and the catalogue it's featured in.Obviously, I'm really excited. I love seeing my cowl being worn by a beautiful model:)


The new Fall 2012 Blue Sky Alpaca catalogue can be found here. There are so many great projects to see, mostly knitted, but a couple of crocheted items...the Tornado Twister being one of them.


Designing this cowl has been a fun experience and I hope Spud and Chloe/ Blue Sky Alpaca will allow me to design for them in the future. The yarn is pretty divine to work with. Here is the link to the post where I blogged about my experience with the yarn.

To see more projects check out these links:

I hope you all had a great weekend...mine was relaxing...I'll blog about it in a few days. For now I'm going to enjoy my newly published pattern. Can you tell that I'm excited?:D

Sunday, May 27, 2012

Another Version of the Chunky Basket

Lately, I have been obsessed with yarn bowls. They are so beautiful and I'm close to breaking down and buying one. This basket was made for a new friend who wants to use it as a yarn bowl.


As you can see, this is almost exactly like the Chunky Crocheted Basket. I changed the handles to make them more substantial. Linda, my new friend I mentioned, wants to be able to put her yarn inside and use it like a yarn bowl. I hope it works well for her.

I just love the color. Blue is and has always been my favorite.


I altered the original pattern. If you are interested in making this version...just follow the instructions below

You will hold two strands of yarn together 

Refer to the instructions for the original Chunky Crocheted Basket for rounds 1-11.

Rnd 12: Ch 2, Hdc in next 8 sts, ch 7, skip next 5 sts, hdc in next 19 sts, ch 7, skip next 5 sts, hdc in remaining 10 sts. Join with sl st.

Rnd 13:  Ch 1, sc in the back loop of each st around (including the back loop of each chain). Join with sl st.

Rnd 14: Ch 2, hdc in next 8 sts, sc in next 7 sts, hdc in next 19 sts, sc in next 7 sts, hdc in each remaining st. Join with sl st.

Rnd 15: Sl st in each st around. Finish off with no knot finishing method...just click on the link and scroll down to find the instructions.


As you can tell, I am addicted to making these baskets. This one can be used as a basket or a yarn bowl. This has inspired me to come up with a whole new yarn bowl pattern. Check back in a few days for that pattern. 

I'm still thinking about buying the real thing, though. They are just so beautiful...I can't decide which color I want. 


I can't decide...they are all just gorgeous. What do you think?...I'm thinking maybe the last one, if it is large enough.

If you would like to win a basket, I'm currently having a giveaway. Go to my previous post and just leave me a comment letting me know you want to be entered to win. I'll choose a winner next Saturday.

I hope you're having a great weekend:D

Sunday, May 6, 2012

A Little Distraction

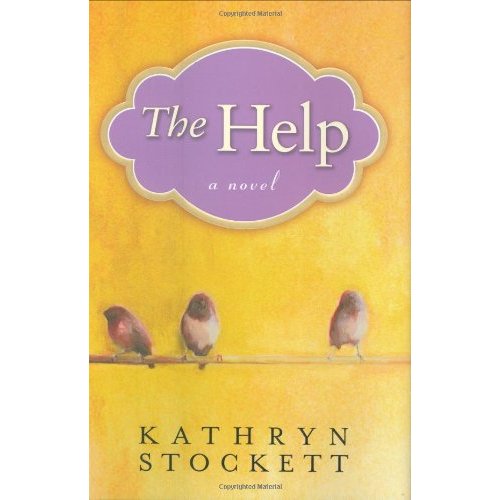
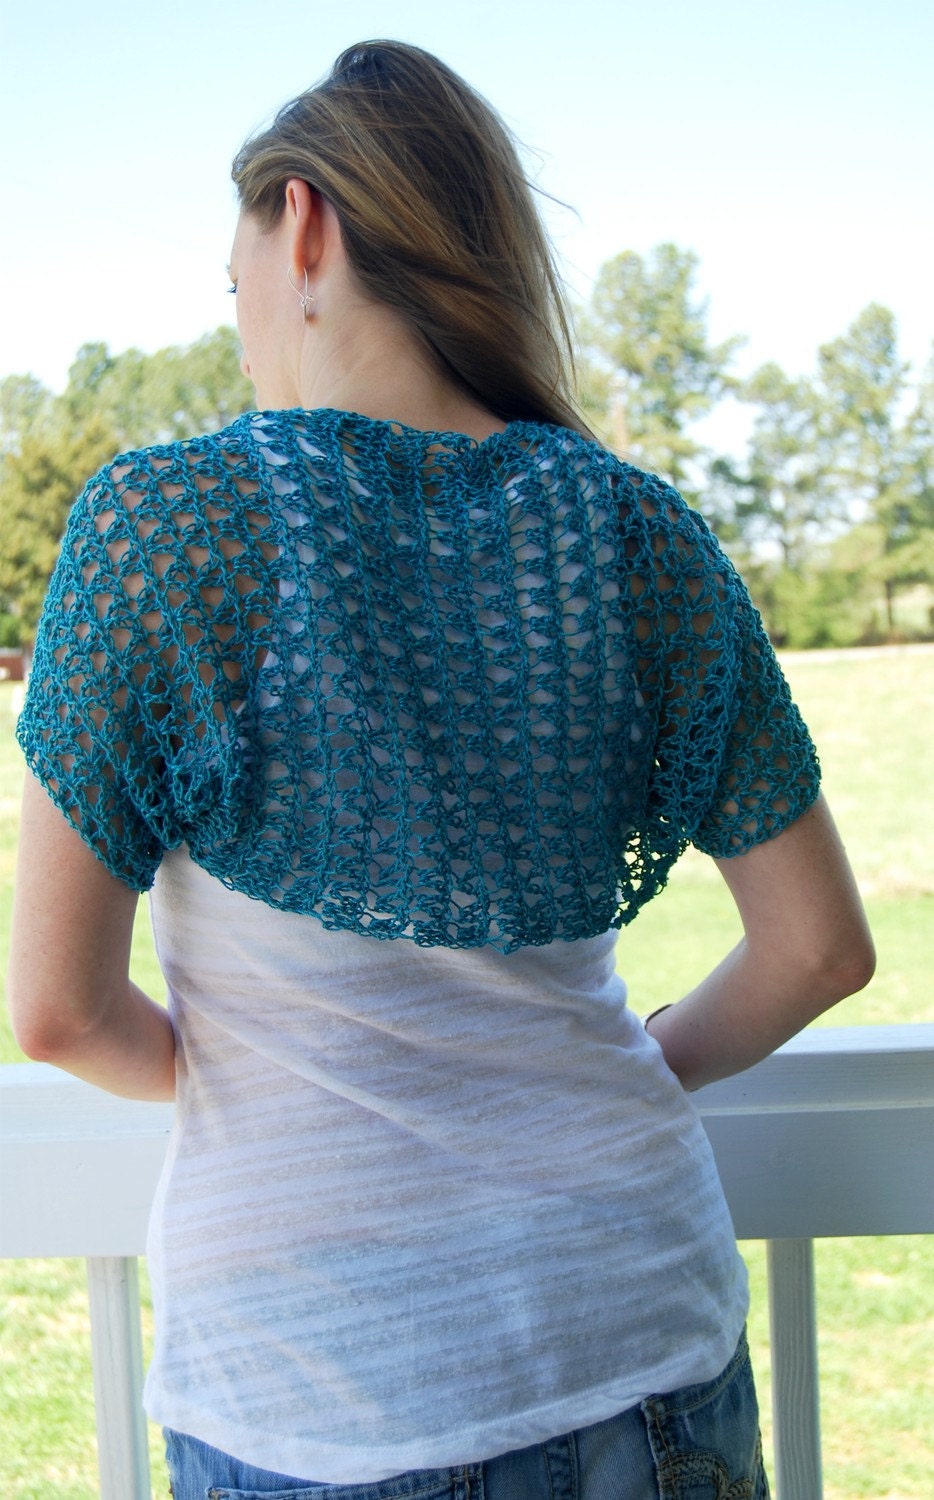
I know, I know...I'm supposed to be working on posting the pattern for the teal shrug. Sorry to make you all wait so long for it. I've been a little distracted and have wanted to read a book for the longest time now. I've been consumed with crochet for what seems like forever. It's been so long since I've read an actual novel. So this has been my recent distraction from crochet


I know a lot of you have probably read this, and I'm having a hard time putting it down:) I've also been trying to catch up on comments, questions, and my favorite blogs.

I wanted to share a link to a fellow crocheter/ blogger's Happy Mitts. They were made from my Colorful Stripey Mitts pattern


Sabine did such a great job. I just love seeing all of your finished projects from patterns found here. It makes me so happy to know that you can make something inspired by my patterns. I guess that is the reason I try to offer most things for free. Here is a photo of Sabine's Happy Mitts taken from her blog...go on over there and check out all of her photos of her mitts. They are just gorgeous


I think I will start sharing projects inspired by patterns found here...with permission of course. So if you have a finished project you would like to share, then send me the link and I'll share a photo of it. It's all about sharing and hoping to inspire others to create:D

Please forgive me for not posting the shrug pattern. I will post it soon, I promise.

Happy Sunday!

Sunday, April 22, 2012

The Winner of the March Giveaway

I hope everyone had a great week and weekend. I finished the last bikini top order that took me a month, and now I'm struggling to finish a pair of fingerless mitts. I guess I'm struggling because I have so much laundry, housework, cooking, and messes that are keeping me busy and away from crocheting.

Anyway, on a brighter note, this post is to announce the winners for the March giveaway. This is the prize:


Ok, I went to Random.org to choose the winners, and here they are...

commenters 9, 22, and 29

If I am not mistaken (if I am, please let me know)

this means Liza, Aimee, and Maureen are the winners.

Congrats and please send me your email so I can send the pattern.

I was hoping to post about the April giveaway, but the details have changed...so I'll have to post about it on another day.

In the meantime, I am working on writing out this shrug pattern...just a little something for free for all of you. Thanks to all of you who commented. I'll have this new one posted in a day or two.


Have a great week!

Saturday, April 14, 2012

March Giveaway...A Little Late

Yes...that's right. It's time for another giveaway. I forgot about March. How did I forget to have a giveaway last month? Busy, busy, busy...I guess. I'm so sorry about that. So I have decided to make it up to you by offering two giveaways in April! The first one will be for a pattern.


This has been a favorite... I sold three today. The pattern includes instructions for both the peach style and the taupe style


This is the pattern that keeps me sooooo busy in the spring and summer months.

If you are interested, just leave me a comment. I'll randomly choose three winners next Sunday. Yes, Three!!!

Next Sunday afternoon I will announce the winner and then announce the details for the April giveaway.

Have a great weekend!

Saturday, March 31, 2012

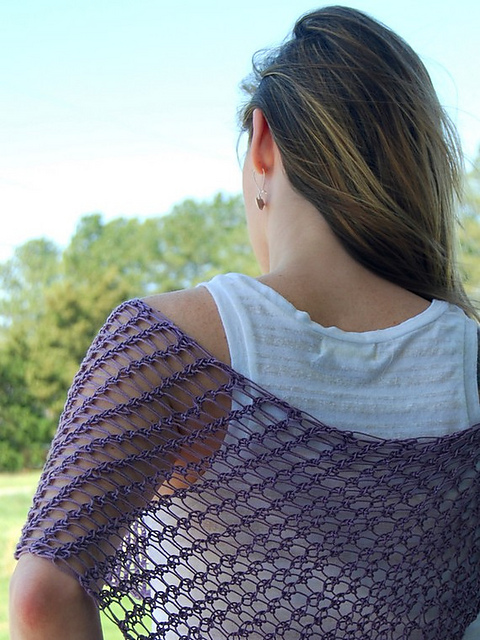
Poncho for Spring

I made this poncho last year...or was it the year before last? I can't remember.


I posted it on Ravelry a few months ago and somehow forgot to blog about it.
I love the light airy feel when wearing it. I think I'll dig it out and wear it to work this week.


This is a quick and easy project. It is extremely stretchy and the one in the photo has not been blocked.

You can download the pattern here or just use the instructions below

Skill Level
Beginner

Materials
Size K crochet hook
Lace or fingering weight yarn (cotton for the warm season)
Yarn needle

Sizes
S/M (large)

Important
Crochet very loosely.
It is a little uncomfortable using a larger hook with smaller weight yarn, but it is necessary to create the openwork design. Scroll up to see close-up showing the stitch.

Crochet in the either the front loops only or back loops only

I did both...the one pictured was worked in the front loops only


Pattern

Ch 25 (29)

Working in the back loop

Row 1: Sc in 2nd st from hook. Sc in each ch across. Ch 1, turn

Row 2: Sc in each st across. Ch 1, turn.

Repeat Row 2 until you reach the desired width to fit around your body. I stopped after 50 rows.

Finish off leaving about 12 inches of tail for sewing.

Fold the piece in half. Using the tail, begin to whipstitch the top of the piece (not the side edges).
Sew for approximately 4 or 5 inches. Finish off.

Weave all ends. The piece may appear small, but the texture is extremely stretchy (the poncho in the photo has not been blocked)


Don't worry about messing up. This pattern can be altered in so many ways. I used size 3 fashion thread for the one in the photo, but you can use any yarn you choose. I like the light weight for the warm weather.

Enjoy!