Showing posts with label hat. Show all posts

Saturday, January 31, 2015

Autumn Hats

I knitted a couple of the Autumn Hats last week. This pattern has been sitting in my Ravelry library for at least a couple of years.


I used Lion Brand Thick and Quick for the pink one. It's much nicer than the purple one. I had the Hometown USA on hand for that one. It's 100% acrylic so it doesn't feel or fit as nice as the pink.


I didn't notice the difference in color until I photographed these. The purples are obviously different dye lots. It's not as noticeable in person.

This is a great instant gratification project. Using size 10.5 and 13 circular needles, I finished both in less than two days. It's not a free pattern, but worth the cost if you want something fast for a gift (or several gifts). If you're interested in the pattern or just want to check it out, click on the link above.

I wish I had someone else to model these. My photos would have been much better. Ireland can almost wear the pink one; our heads are similar in size.

I'm still working on the Scrump hat, and having trouble with the yellow stuff on top of his/ her head. 


I don't know what to do about that. Any ideas are greatly appreciated. 

I really don't know why Ireland chose this for a hat, but I'll make anything she asks from me.

Any ideas?

Monday, January 19, 2015

Knitting Fever

I love knitting almost as much as crocheting. I'm happy to say that I'm actually improving. I thought I would share my latest projects.


This hat was made in alpaca... Plymouth Yarn Baby Alpaca Ampato. It's sooo soft.


Alpaca yarn has to be a fave for me. This hat isn't perfect, but it's ok. I finally used circulars with no problem. Yaay for progress. I'm contemplating purchasing a set of circulars. I went to a Tuesday Morning a couple weeks ago and found a variety of ChiaoGoo circulars. They were priced much less than anywhere else I've seen them sold. I heard they even have ChiaoGoo sets priced between $30 and $40. A knitter I met recently had just been in and bought the last set. I'll try again in a few days.

Ok next hat...


This one was made using Colorwul. Ignore the hair...my gosh it looks as if I haven't brushed it in days. I whipped these basic hats out in a day. I had no problems at all.


Now I'm working on a crocheted hat for Ireland. It's been awhile since I've made her a new one. She wanted Scrump. I thought what the heck is a scrump. I had to google it and found out that Scrump is Lilo's doll from Lilo and Stitch. So Scrump it is...


I'll come back in a couple of days with the finished product, and maybe even post the pattern.

Have a great week!


Sunday, February 23, 2014

Colorwul Knit Projects

I've learned something about myself lately. I can knit like a champ with straight needles...

Well, sort of
But circular needles are another story. I just cannot use them. I mess up my gauge. Hats are always too big or small, and the twisting drives me nuts.

I love the Patons Colorwul yarn. The hat above is in the Ocean colorway. The mitt below is my favorite colorway.


I decided to use a simple stitch pattern to show the colors. My goal is to knit the Cable Yak hat below. I hope cables will be easy. I guess I should get friendly with the circular needles. Any advice would be greatly appreciated.

Raveled by MariChiba found here

Today is a beautiful day here in NC. I heard Michael outside with the chain saw. I looked out and saw this...


It's the rosemary that I love. The one that I've been taking pics of every season. Well, now it has been butchered. I am mortified. I would cry, but I guess it's not that serious. But still!

In this pic from last summer, you can see it in the background
 It better come back. If not, I just may hurt Michael. Why do men think they can just cut down whatever they want?

Monday, December 17, 2012

Heather's Sock Monkey Hat

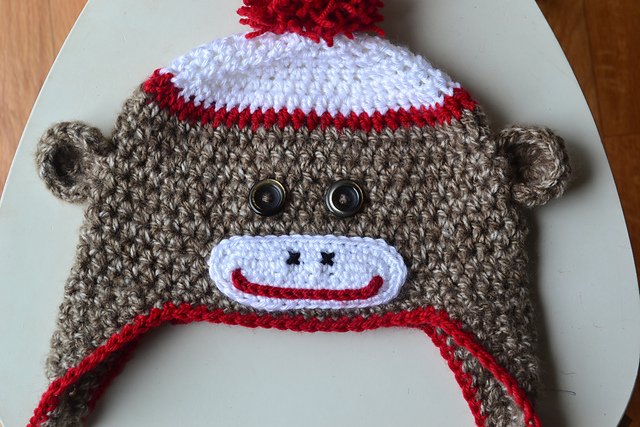
A few weeks ago, Heather from Pass the Cereal made this Sock Monkey Hat. Somehow I missed it. Isn't it the cutest thing? I just had to share it.


Heather did so great with this hat. I think it looks better than the original. I may have to copy hers...hahaha


I love it...these photos are just adorable. I want to make another one now:)

You can find the pattern for this hat here.


Saturday, November 3, 2012

Hello Kitty Inspiration

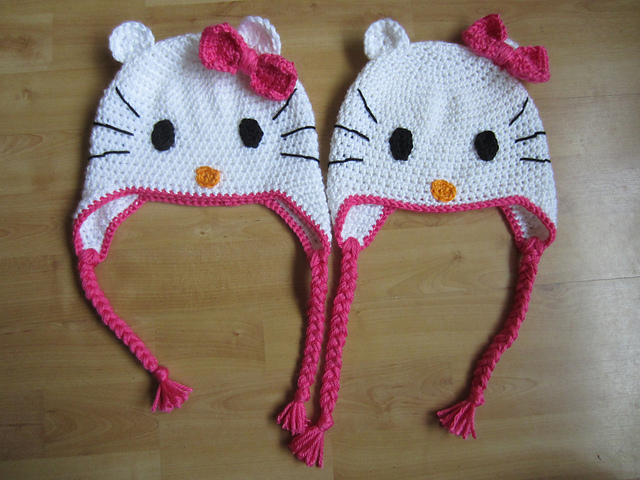
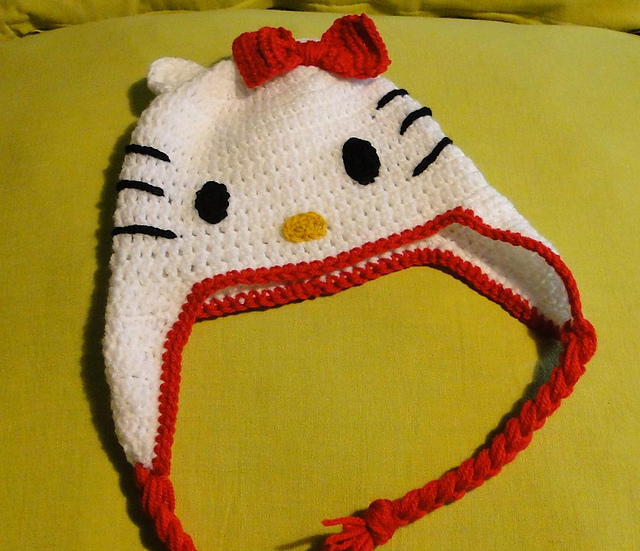
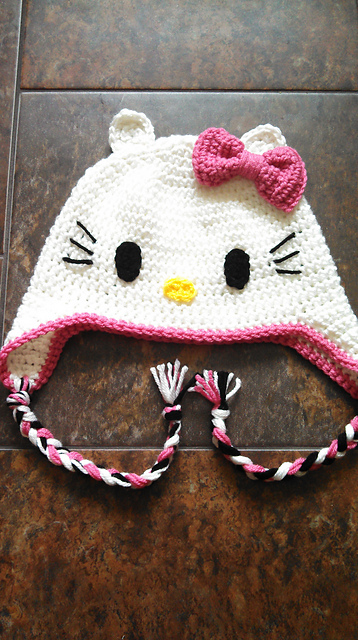
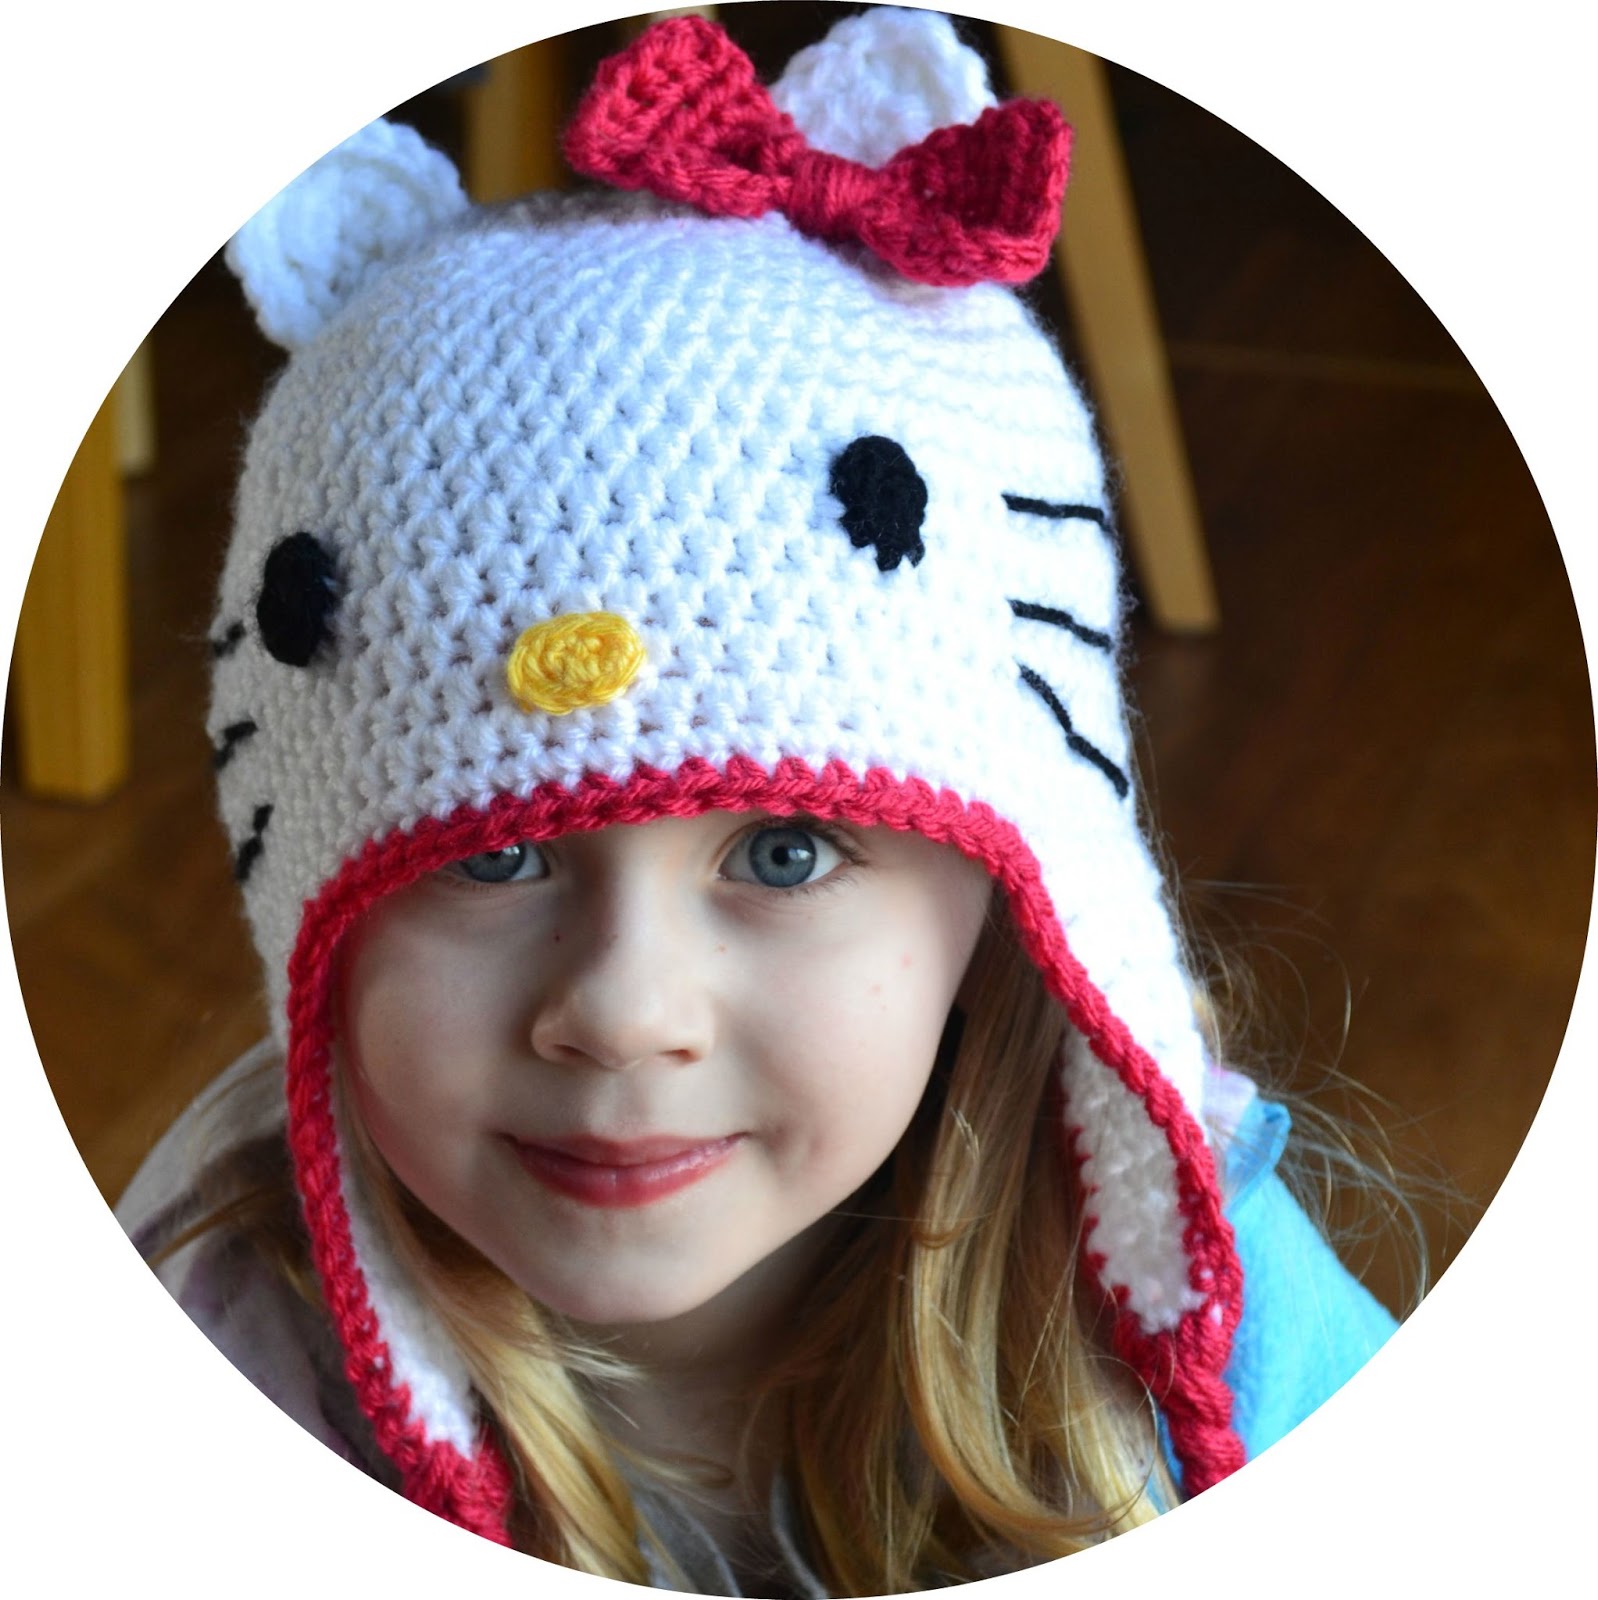
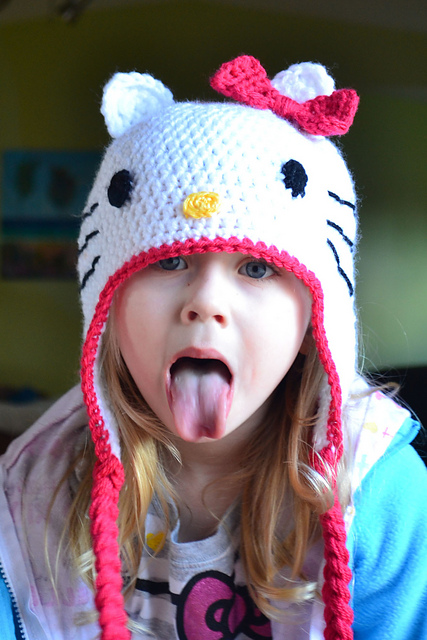
Earlier this year I posted the Hello Kitty hat pattern. It has become a favorite and I continue to receive emails and messages about this pattern. So, I thought I would share some of the hats that you guys have made with this pattern.


These are so cute. They were made by Wilma over at Lutje Crochet and More

Here is a very cute version in red and white


Here is another cute pink one posted on Ravelry


Ireland has requested another one, but made in white and purple. I guess this is what I'll be doing this weekend.

Keep sending me your photos...I love to share:D

Monday, October 8, 2012

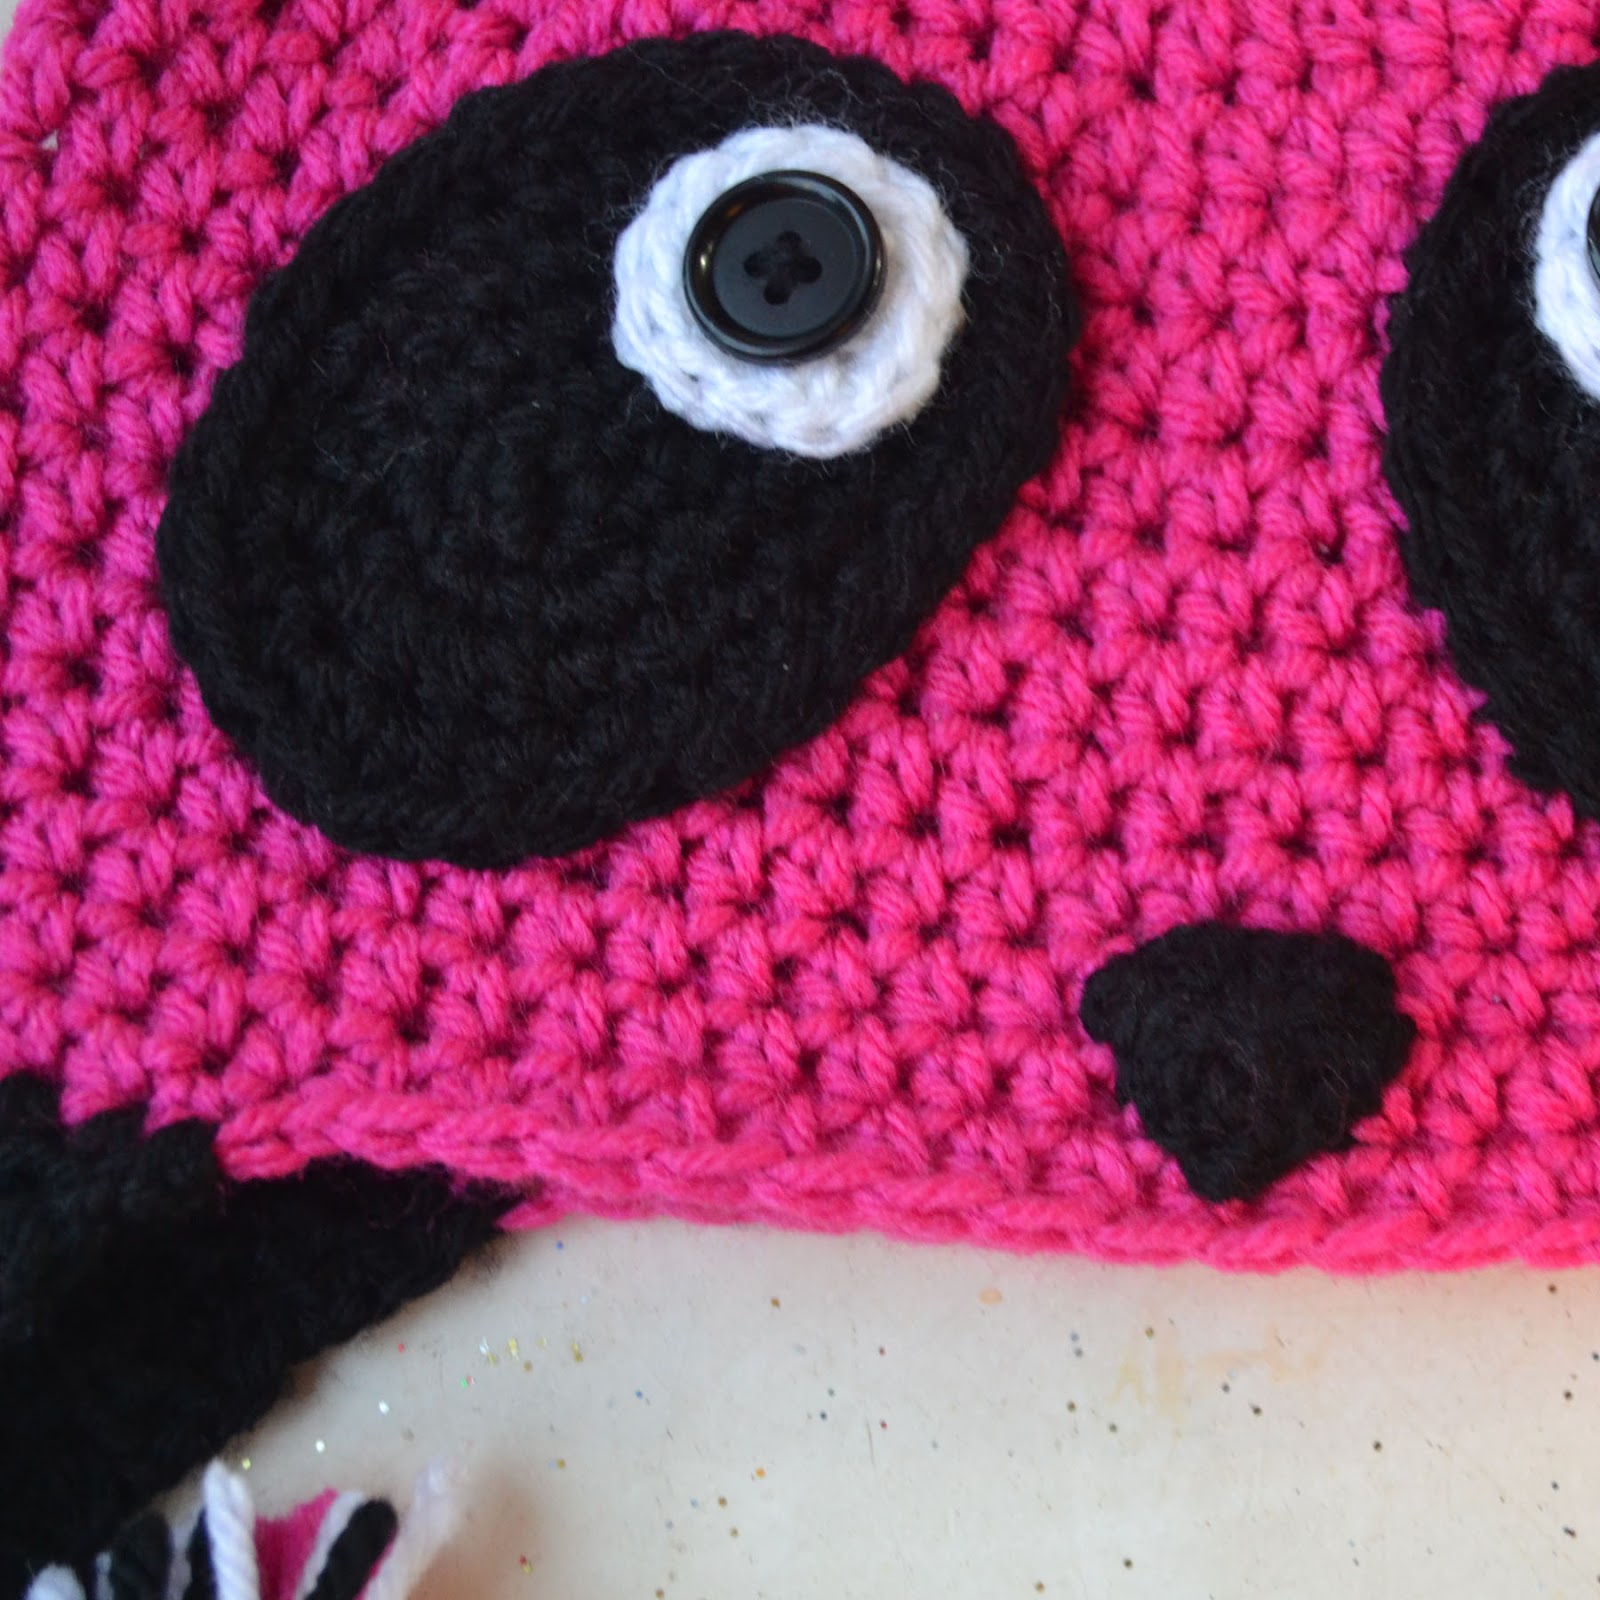
The Pink Panda

Finally...I know, I know. I keep promising this pattern, but life seems to get in the way.


Materials
Worsted weight yarn (pink, black, & white)
You'll need less than 3.5 oz of pink and small amounts of black and white
Size H crochet hook
Yarn needle
2 black buttons

Size
Fits a child, teen, or small adult head
I made this hat for a 6 year old and it barely fits my head. (I have a pretty small head)


Note: For this pattern I did not join each round. I hate the seam, so I just kept going around. You may need to mark the first stitch to keep track of the ending/beginning of each round.


Pattern

With Pink, ch 3

Rnd 1: Work 7 hdc in 3rd chain from hook. (8 hdc) The first 2 chains as a stitch. Do not join.

Rnd 2: Work 2 hdc in each st. (16 hdc)

Rnd 3: Work (1 hdc in next st, 2 hdc in next st) around. (24 hdc)

Rnd 4: Work (hdc in next 2 sts, 2 hdc in next st) around. (32 hdc)

Rnd 5: Work (hdc in next 3 sts, 2 hdc in next st) around. (40 hdc)

Rnd 6: Work (hdc in next 4 sts, 2 hdc in next st) around. (48 hdc)

Rnd 7: Work (hdc in next 5 sts, 2 hdc in next st) around. (56 hdc)

Rnd 8: Work (hdc in next 6 sts, 2 hdc in next st) around. (64 hdc)

Rnds 9-17: Work hdc in each st around. On the last rnd you will finish off. I worked a sc then sl st in the last two sts, just to prevent seeing a really pronounced finish.
(If you are using the same color for the ear flap don't worry about the sc and sl st.)

First Ear flap

Holding the hat with right side facing, attach Black yarn with sl st. 

Row 1: Ch 1 and work sc in same st. Sc in next 16 sts. (17 sc) Ch 1, turn. 

Row 2: Sc2tog over the first 2 sts, sc in each st across. Ch 1, turn. (16 sc)

Row 3: Repeat row 2, until 1 st remains. Finish off.


Second Ear flap

Skip next 17 sts and attach Black yarn with sl st. Repeat instructions for first ear flap.

I did not crochet an edging for this hat. I like the way it looks without one.


Finish off, leaving a tail long enough to use in the braid. (12 inches or so) I really hate weaving ends when I don't have to:D


Ears

* You will hold two strands of yarn together. This makes the ear thicker and stand up better *

With Black yarn, Ch 4

Row 1: 7 dc in the 4th chain from hook (8 dc) TURN

Row 2: Ch 2, hdc in the first st and next st, (2 hdc in next st, hdc in next st) 3 times. (12 hdc)

Finish off leaving a tail long enough to sew onto the hat.

Nose

With Black yarn, Ch 5

Row 1: Sc in 2nd ch from hook and in next 3 sts. (4sts) Turn

Row 2: Sc2tog twice (2 sts) Turn

Row 3: Sc2tog. Finish off leaving tail long enough to sew nose to the hat.


Eyes

With White yarn, ch 2

Rnd 1: 6 sc in 2nd chain from hook.

Rnd 2: 2 sc in each st, finish off. (12 sc)

This will be your inner eye, where you will sew the buttons

Outer Eye Spots

Don't fret over the stitches. If you find that you are off by a stitch, it will be ok as long as you end up with an oval shape. Work these spots in a continuous oval. Do not join after each round.

With Black Ch 4

Rnd 1: 2 sc in 2nd ch from hook, sc in next st, 4 sc in last st. Rotate, working into the other side of the chain. Sc in next 2 sts. Do not join.

Rnd 2: 2 sc in each of the next 2 sts, sc in next 2 sts, 2 sc in each of the next 3 sts, sc in next 3 sc.

Rnd 3: 2 sc in next 3 sts, sc in next 4 sts, 2 sc in next 2 sts, sc in next 6 sts.

Rnd 4: 2 hdc in next 3 sts, sc in next 7 sts, 2 sc in next 3 sts, sc in next 7 sts.

Rnd 5: Hdc in next st, 2 hdc in next 3 sts, hdc in next st, sc in nexxt 8 sts, 2 sc in next 3 sts, sc in next 9 sts. Finish off using no knot method. Leave a tail long enough to sew to face.

Sew the inner eyes onto the outer eye spots, referring to the photos. Then sew the entire eye spot to the hat. Try to place the spots more vertical than horizontal. Mine may be a touch too horizontal.  To me, this makes the face look like a raccoon (maybe I've been looking at the face for too long now;D)

As always, remember to sew through the top layer of the stitch on the hat. Don't go completely through to the inside, this will make the inside of the hat look messy.


Braids

I used Black, Pink, and White

Cut 10 strands of each color. You'll use 5 strands of each color for each earflap.


Please let me know if you find a typo or mistake. I'll gladly correct it. I'll take better photos tomorrow and hopefully Ireland will cooperate.

Don't forget to show me your finished Pandas...I'd love to share them.

Sunday, June 10, 2012

Still Trying to Customize Hat Sizes


Yes, I'm still trying to customize hat sizes. Over the last few months, I've gotten numerous comments and questions about hats sizes. Considering we all crochet with different tensions/ gauges, it's impossible to give definite numbers of stitches. The charts are great but they do not tell us when to stop increasing. This has always been my problem with gifts. If I make something for Ireland, I'll just put it on her head and see how it fits and then adjust from there. But when you have to make a gift, it's tough to guess.


I've decided to get all of Ireland's hats that I've made for her since birth to use for my experiment. I have compared the hats to photos of her wearing them. I've looked at the dates to determine how old she was when wearing. This is how I've measured for sizes.

This is a general chart, but still pretty helpful...Better than nothing. The measurements listed in the chart represent the size of the circle you should have when increasing. When you reach the desired size then stop increasing and just crochet evenly thereafter.


Age                                    Diameter of circle

Newborn                                      4 inches

3-6 months                                   5.5 inches

9-12 months                                 6-6.5 inches

24 months                                    6.5-6.75 inches

Toddler and small child                  7 inches

Adult woman                                7.25-7.5 inches

For instance if you are making a hat for a 12 month old... increase until you have a circle that measures 6-6.5 inches across, then continue to crochet each round evenly with no increases.

The hat in the photo above will be for a child about a year old. So as you can see the circle measures right at 6 inches.

The finished length will also vary according to age


Age                                          Finished Length

Newborn                                       5 inches

3-6 months                                    6-6.5 inches

9-12 months                                  7 inches

24 months                                     7-7.5 inches

Toddler and small child               7.5- 8 inches

Adult woman                                8.5-9 inches

Large adult                                    10 inches

The blue hat above will be for a 12 month old, so I'll need to keep crocheting for a couple more inches.

This green hat is for a teen or adult woman, so I'll stop at about 9 inches.

Edit: If you are making an ear flap hat, then the length will decrease slightly.


Of course these measurements are not exact for each child and adult. I have made hats for large adult women heads that measure more than 10 inches in length. These are general measurements intended to offer a little bit of help, instead of trying to make a hat blindly without a clue:D

I hope this helps.

Have a great week!

Sunday, March 4, 2012

Hello Kitty Hat Pattern

I realized this weekend that I had not posted the Hello Kitty Hat pattern. So I apologize for not doing so. I completely forgot about it. Please forgive me:D


I haven't posted the new rug patterns as promised. Please forgive me for that as well. I have been struggling with a horribly nasty cold for two weeks now. It seems to get worse every day. I thought colds were supposed to improve every day:(

I've been so, so lazy this weekend...watching tv, basketball (my Tarheels). I haven't even cooked a meal. Michael went out and brought home our meals for three days now. Being sick is not all bad...hehe:D

Anyway here is the pattern and please overlook any craziness with the instructions...I wrote this up pretty quickly. I will go back over it tomorrow and correct needed mistakes. I will also take more detailed photos and post those as well.


Materials

Worsted weight yarn (I used Vanna’s Choice Baby in White and Cherry)
Small amount of black and yellow
Size G and H crochet hooks
Yarn needle

Size
Fits a small child to teen/ small adult
It is very easy to alter the size. Just take out an increase row and an even row for a toddler or add an increase row and an even row for an adult size

Edit: I have received lots of questions about sizing so I would recommend using this chart. I posted this in June.

Pattern

Note: I hate the seam. You can see it in one of the photos below. To make a seamless one, just keep going around without joining. Just keep up with your first st (marking it if you have to). When you get to the earflap just start with the singles (eliminating the join).

With H hook (G if you crochet loosely)

Rnd 1: Ch 3, 7 hdc in 3rd ch from hook. Join with sl st. (8 hdc the first 2 chains count as the first hdc of the rnd)

Rnd 2: Ch 2, hdc in same st. 2 hdc in each st around, join. (16 hdc)

Rnd 3: Ch 2, hdc in same st, hdc in next st. (2 hdc in next st, hdc in next st) around, join. (24 hdc)

Rnd 4: Ch 2, hdc in same st, hdc in next 2 sts. (2 hdc in next st, hdc in next 2 sts) around, join. (32 hdc)

Rnd 5: Ch 2, hdc in same st, hdc in next 3 sts. (2 hdc in next st, hdc in next 3 sts) around, join. (40 hdc)

Rnd 6: Ch 2, hdc in same st, hdc in next 4 sts. (2 hdc in next st, hdc in next 4 sts) around, join. (48 hdc)

Rnd 7: Ch 2, hdc in same st, hdc in next 5 sts. (2 hdc in next st, hdc in next 5 sts) around, join. (56 hdc)

Rnd 8: Ch 2, hdc in same st, hdc in next 6 sts. (2 hdc in next st, hdc in next 6 sts) around, join. (64 hdc)

Rnd 9- 17: Ch 2, hdc in next st. Hdc in each st around, join. (64 hdc)


First earflap:

Row 1: Sc in same st as join. Sc in next 12 sts. Ch 1, turn. (13 sc)

Row 2: Sc2tog over the first 2 sts, sc in each st across. Ch 1, turn. (12 sc)

Row 3: Repeat row 2, until 1 st remains. Finish off.

Second earflap

Row 1: Skip next 21 sts and attach with sl st in the next st. Ch 1 and sc in the same st and in next 12 sts, Ch 1, turn (13 sc)

Row 2: Sc2tog over the first 2 sts. Sc across. (12 sc)

Row 3: Repeat row 2 until 1 st remains. Ch 1 and do not finish off.

Work a round of sc around the hat, placing 3 sc in the point of each earflap. Finish off
Leaving approximately 12 inches of tail, attach Red to one of the earflaps. Work a round of sc around the edge, leaving a finishing tail long enough to use in the braid. I start and finish with long tails so I can use them to braid with and won’t have to weave them into the hat.

You'll notice that the earflaps are not totally centered. The front of the hat is the side where there is more space between earflaps. Make sure you take note of this when you begin sewing your eyes, nose, ears, and bow onto the hat.

Eyes (G hook)

With Black, Ch 5
2 sc in 2nd ch from hook. Sc in the next 2 chs. 3 sc in last ch. Do not turn. You will work in the opposite side of the ch. Sc in next 2 chs. Sc in last ch which is the first ch. (10 sc)
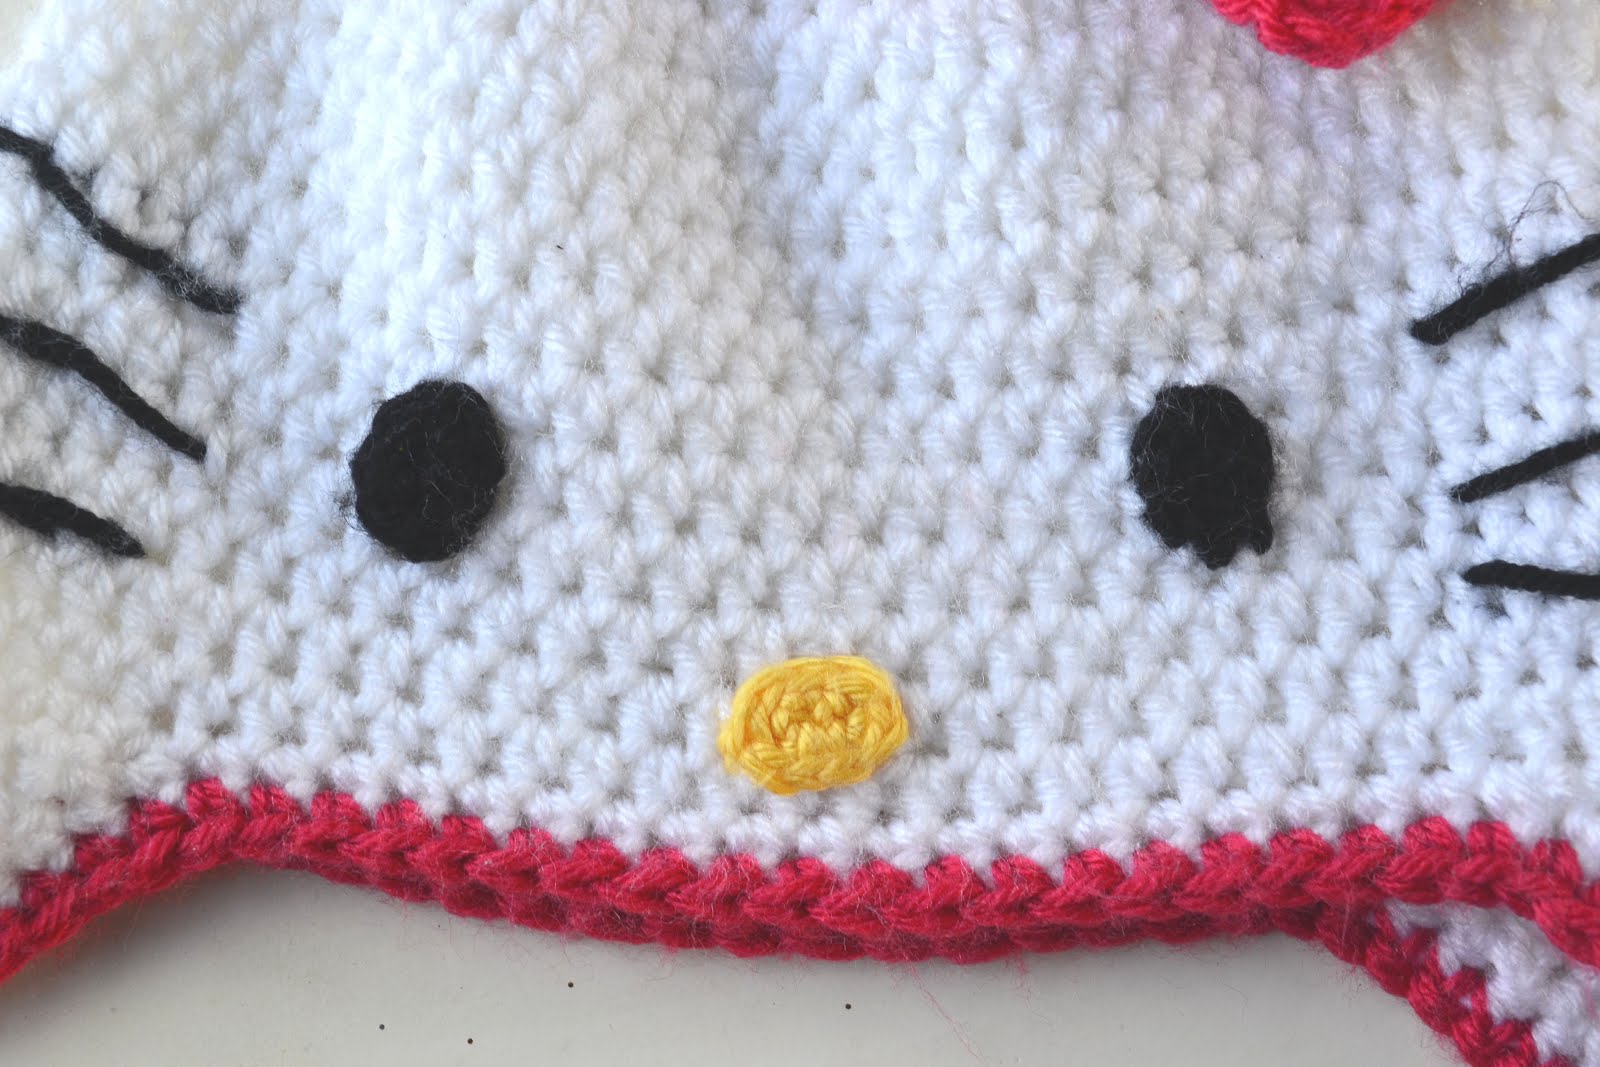
Don’t fret too much over the eyes and nose…They do not have to be exact, just small ovals.


Nose (G hook)

With Yellow Ch 4

2 Sc in 2nd ch from hook, sc in next st, 3 sc in last ch. Do not turn. Work in the opposite side of the ch. Sc in next ch, sc in next st. Sc in same chain as the first sc worked. You’ll end with a small oval shape. (8 sc)


Ears (G hook) and holding 2 strands of yarn together
With White Ch 3
Row 1: 7 Hdc in 3rd ch from hook. Ch 1, turn (7 hdc)

Row 2: 2 sc in first st. sc in next st, 2 sc in next st, 2 dc in next st, 2 sc in next st, sc in next st, 2 sc in last st. (12 sts) Finish off.


Bow

With Red Ch 11

Row 1: Hdc in 3rd ch from hook. Hdc in each st across. Ch 2, turn. (10 hdc)

Rows 2- 10: Hdc in each st. Finish off

Take a long strand of Red and wrap around the middle of the bow to draw it in. Wrap several times. Tie the ends in the back of the bow. Using the yarn needle weave the ends into the bow to hide then use these same ends to sew onto the hat. Sew the middle of the bow and bottom of the bow onto the hat. I found that if you do not sew the bottom of the bow to the hat, it will curl up.


Whiskers

Use a yarn needle to embroider the whiskers. They will be straight if you work into the stitches and not in-between them.


Braids
I used only the red, but you can make them however you wish. I used 15 strips for each earflap.

Sew the eyes and nose onto the hat. Do not sew the eyes too close together. Mine may be a little too far apart. I used a picture to go by.


There you go...enjoy!

Please do not hesitate to inform me if you find mistakes, or have any difficulty with these instructions.

Monday, February 6, 2012

Another Owl Hat

This weekend I made progress on my pattern for the yarn co, worked on my ripple, watched the Super Bowl, and made this new hat for Ireland. I get lots and lots of messages about the owl hat, so I wanted to add details about this one with lots of photos.

I've made several of these hats, but none for Ireland. So I decided to make one for her with the leftover scraps from previous hats. It actually started as a piggy hat, but morphed into an owl because I ran out of pink. It's not a piggy, but she still likes it. She has a piggy hat on the brain so I think I'm still going to have to make one of those too.

I changed a few details for this hat. The original is here.

For this one, I obviously made it larger.


I also made the eyes larger by adding a couple of rounds. The larger the hat, the larger the eyes need to be.


Eyes (I used blue for rounds 1 and 2, then white for rounds 3-5)
Ch 2
Rnd 1: 8 sc in the 2nd ch from hook.(8 sc)
Rnd 2: 2 hdc in each st around. Join with sl st to first st (16 hdc)
Rnd 3: 2 sc in first st, sc in next st. (2 sc in next st, sc in next st) around. Join with sl st. (24 sc)
Rnd 4: Ch 3 (counts as first dc). Dc in same st. Dc in next 2 sts. (2 dc in next st, dc in next 2 sts) around. Join with sl st. (32 dc)
Rnd 5: 2 sc in first st. sc in next 3 sts. (2 sc in next st, sc in next 3 sts). Join with sl st. (40 sc)

I added the eyebrows later after the eyes were sewn onto the hat. I worked a sc around 16 sts. Refer to the photos.

Nose
Ch 8
Sc in 2nd ch from hook and in each ch across. Ch 1, turn. (7 sc)
Sc2tog in first 2 sts, sc in remaining sts across. Ch 1, turn (6 sc)
Sc2tog in first 2 sts, sc in rem sts across. Ch 1, turn. (5 sc)
Repeat the decreases ending with one stitch. Finish off leaving tail long enough for sewing.


I also changed the edging. I wanted 2 colors for the edge and a more finished look. Recently, I've gotten a couple of comments asking me how to make projects look more neat and finished. Basically, for edgings, I always add a round in the same color before changing to the contrast color. If you change to the contrast color for edges (like the sides of the earflaps) then the edges will not be as neat as possible.

Then for this hat I added an extra round of edging with the blue. I worked into the back loop to make the pink/ blue combo look even neater (is that a word?)


Also, to make the face look neat, try to take lots of time to center the eyes and nose. When sewing, only work under the first layer of the stitch on the hat so the back side will be tidy. You won't have a mess on the inside of the project. And if I'm not happy about the face, I'll redo it until it looks like I want it to.


Raveled here

I used worsted weight yarn and a G (4mm) hook.
White and pink is Caron Simply Soft
Yellow is Caron Simply Soft Eco
Blue is Vanna's Choice
Orange is Red Heart


It's a new month so that means giveaway! I'll be back in a couple of days with the details.

Saturday, January 28, 2012

My Little Hello Kitty Fanatic

I decided it was time to make Ireland a new hat.


Ireland has a grey and pink sock monkey hat that she wears all the time. I made it for her last year and basically got tired of seeing her wear it every single day. Don't get me wrong, I love that she loves it and wants to wear it. I just wanted to see her in something new. Since she's a Hello Kitty Fan, I started making this hat for her last week.


When I almost had it finished, I showed it to her...I just couldn't help myself. Guess what she said... I wanted a piggy hat. Grrrr.... (I did remember her telling me in the recent past that she wanted a piggy hat) I didn't let that comment stop me. I sewed the ears, face, and whiskers on and then showed it to her. By that time she had warmed up to the idea of having a Hello Kitty hat and was so excited.


Now she loves it and tells everybody she sees that her mommy made her hat for her. That makes me feel so happy.

I'm still pondering over the piggy hat. Maybe...maybe next year.

After making the Elise shawl, I have decided to make another shawl with Noro (Uugghh, that's another post on another day). I'm looking for a good pattern...any suggestions?

For now I'm going to write up the Hello Kitty Hat pattern :D

Saturday, January 21, 2012

Just Another Sock Monkey Hat Pattern


I've been wanting to post all week about how interesting my life is and all the interesting things that I do, not related to crochet. But I realized something...my life is pretty boring. I don't have a lot to blog about. I'm on Twitter and all I talk about is crochet. I seriously need a life I guess :D


With that in mind, I decided to post my Sock Monkey hat pattern. I've used other patterns to make these hats and they all turned out great. However, this time I decided to make this hat with a totally new pattern. I like my own little shortcuts and ways of doing things.


Materials
1 skein Bulky weight yarn (I used Lion Brand Jiffy yarn in Camel Spray)
Red, White, and a tiny amount of black yarn
Size H & I crochet hooks
Yarn needle
2 buttons

Size
The size in the photo will fit a 4-12 year old
This pattern is easily altered to fit any size
I used bulky weight. If you choose to use worsted weight then you'll end up with a toddler or baby sized hat

I forgot to get the gauge before I mailed it out, but I did crochet a little tightly. If you crochet more loosely, the hat will fit an adult.

Pattern

With I hook and white, Ch 3

Rnd 1: 7 hdc in 3rd ch from hook (which is the 1st ch made) Join with sl st to the top of first st. (8 hdc)

Rnd 2: Ch 2 (counts as first st here and throughout). Hdc in same st. 2 hdc in each st around. Join with sl st. (16 hdc)

Rnd 3: Ch 2. Hdc in same st, hdc in next st. (2 hdc in next st, hdc in next st) around. Join with sl st. (24 hdc).

Rnd 4: Ch 2, hdc in same st, hdc in next 2 sts. (2 hdc in next st, hdc in next 2 sts) around. Join with sl st. (32 hdc).

Rnd 5: Ch 2, hdc in same st, hdc in next 3 sts. (2 hdc in next st, hdc in next 3 sts) around. Join. (40 hdc).

Rnd 6: Ch 2, hdc in same st, hdc in next 4 sts. (2 hdc in next st, hdc in next 4 sts) around.
Join. (48 hdc).

Rnd 7: Ch 2, hdc in same st, hdc in next 5 sts. (2 hdc in next st, hdc in next 5 sts) around. Join. Finish off. (56 sts).

Rnd 8: Using the red, attach with sl st and ch 2. Hdc in next st and each st around. Finish off.

Rnd 9: Using the camel, attach with sl st and ch 2. Hdc in next st and each st around. Join with sl st.

Rnds 10-17: Ch 2, hdc in each st around, join with sl st. Do not finish off.

Earflap

Ch 1, sc in same st and in next 10 sts, turn (11 sc)

Ch 1, sc2tog, sc in next 9 sts, turn (10 sc)

Ch 1, sc2tog, sc in next 8 sts, turn (9 sc)

Repeat this method of decreases until you end with one stitch, finish off.

2nd earflap

Holding the hat with the right side facing skip 17 sts from the first row of the earflap just made.

Attach with sl st and ch 1. Sc in same st and in the next 10 sts, turn. (11 sc).

Work this earflap the same as the first, but do not finish off when you finish the last row.

You will work a sc round all the way around the hat. Evenly place 11 sc in the sides of each earflap and 3 sc in each corner. Finish off.

In any corner, attach with red yarn leaving a long enough tail to use as part of the braid. Work a row of sc all the way around the hat. Remember to place 3 scs in each corner. Finish off, leaving a long enough tail to use as part of the braid. (I love ways to eliminate weaving ends)

Mouth
Ch 14
Rnd 1: Sc in 2nd ch from hook, sc in next 11 ch, 3 sc in last ch. Working in the other side of chain, sc in next 11 ch. 2sc in the last ch. Do not join.
Rnd 2: 2 sc in the first st, sc in the next 11, 2 sc in each of the next 3 sts. sc in next 12 sts. 2 sc in next st, do not join.
Rnd 3: 2 sc in first st, sc in next 14 sts. 2 sc in next 3 sts, sc in next 14 sts. 2 sc in next sts, sc in last st.
Using my favorite special finishing, leaving a tail long enough for sewing. (Refer to the chunky hat tutorial for the finishing)

Ears
Change to H hook and hold 2 strands of the camel spray together. Crochet tightly

Ch 3
Row 1: 7 Hdc in the 3rd ch from hook, turn. (8 hdc)
Row 2: Ch 2, Hdc in first st, 2 hdc in each st. (16 hdc)
Finish off leaving a tail long enough for sewing


Braids
Cut Nine strands for each side. You should already have 1 strand (the beginning and ending tails) for one side


Make a pom pom and sew onto the top of the hat.

Using photos for reference, sew the eyes and mouth onto the hat. When sewing, only sew through the top layer of the stitches on the hat so the back will look nice and neat.


Using the red, sl st the smile onto the mouth piece. I played around with it a few times to make it look the way I wanted. I did this after everything was sewn into place. I tucked each of the tail ends into the underside of the hat into the camel. (If you don't like this method you can always sew a smile with a yarn needle. The photos of Ireland wearing the hat have a smile sewn this way. I later took it out and used slip stitches to make it look smooth and neat)


As always, you can leave me a comment or send me a message if you need help. I wrote this up pretty fast so there may be mistakes. I hope not, but feel free to let me know. I check messages a couple times each day.

Enjoy!