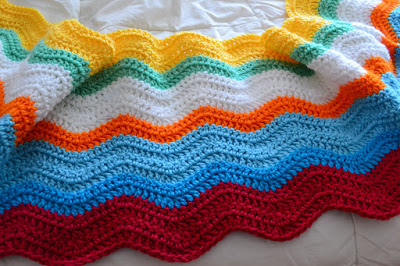
No, this is not my PIP. I am posting this cowl pattern by request. This is a wonderful cowl for beginners...or anyone who loves plushy and soft crochet projects:)
I made this cowl a year ago and put it in my Etsy shop. Of course I kept the one in the photo and wore it a couple of times last winter. Sometimes I get comments on Etsy asking how to make it. I have never written a pattern down for this cowl because it is too simple to write down. It really can't be called a real pattern... i don't know...it just seen too basic to call a pattern.
I figured there were patterns out there already for something like this, so I never even considered writing it down. Well, someone messaged me again asking how to make it so I decided to go ahead and post it here.
This cowl is so simple. It is the most basic cowl you can make. These instructions are great for anyone...especially beginners. It is a mindless creation...meaning it takes literally no brainpower. I am a tv junkie. I love to sit and veg out in front of the tv at night, after the little one goes to bed. Of course, I am always crocheting (or trying to knit) while watching tv. So if you're like me...you will love this. You can mindlessly make this in a matter of minutes or an hour or so.
Like I said before...it is so basic and simple...so here you go
Note: I try to include the most accessible yarns in my patterns. I love being able to buy yarn at major stores that we all shop at. Of course, I love my local yarn shop and shop there more than anywhere else, but for many people, the major chain store is the most accessible.
Materials
3 skeins of super bulky yarn I used 6 weight like Lion Brand Hometown or the Thick and Quick.
Size M crochet hook
yarn needle
Gauge
Not that important with this type of project
Note: Crochet loosely. I'm getting messages and comments about the size. If you crochet tightly, force yourself to loosen up with the tension so the cowl will drape and fit nicely
Pattern
I like my method of working the starting chain better...Ch 87 and begin working into the ch before joining.
Rnd 1: Working into the back ridges of the chain, place hdc in 3rd chain from hook, hdc in each ch till the end. Join with a sl st to the top of first st.
You will take the starting tail and join to the other side. This method will prevent worrying about twisting the starting chain.
If you choose to go the traditional route...
Ch 87, join with sl st to first ch (careful not to twist the chain)
Rnd 1: Ch 2 (counts as first st). Hdc in the back ridge of each ch, join with sl st to top of beginning st.
Rnd 2-14: Ch 2, Hdc in each st around. Join with sl st in the first st. Finish off.
I made mine as a continuous round. I did not join each round. This will give you a seamless cowl...but it will be off (not perfectly lined up) at the beginning and ending. (doesn't really show)
If you get bored you can work in the back loops for each st or you can totally change the look of the hdc by working in the ridge on the back of the hdc. This st looks really amazing. I just wish I had a photo of the result of this stitch.
The cowl in the photo below is the same cowl, but I used worsted weight yarn...Patons wool, I believe. The only difference is the number of chains and sts per row and I added a few more rows. I used an I (5.5mm) hook. I gave this cowl away as a gift, so I'm not sure about the number of chains.
So you can do a lot with this basic pattern. You can use bulky yarn for a ultra thick, warm cowl or worsted yarn for a lighter one.
See how easy this is. I can hardly call this a pattern.
Enjoy...my PIP is coming, it really is.


