Monday, November 14, 2011

Ripple Progress


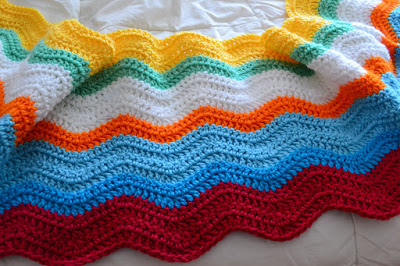
This weekend I have been rippling little by little. I'm pretty happy with my progress. I have a couple of orders for fingerless mitts that I'm trying to finish, so that has taken up most of my time.


But I still added two shades of pink and two shades of purple, with only one trip to the store for yarn. I still don't think I have the lighter purple right. I wanted more of a lavender, but I may leave what I've done so far. Not sure yet... The colors in the photos look a little dull... too lazy to fix them.

As I was getting the camera ready to take the progress shots I looked outside and saw my pansies. They are so pretty right now, and I took a few shots of them...it was like they were telling me to take their picture. I love pansies.


With all of these projects, my PIP (pattern in progress) is coming along much slower than I wanted. It will be a few more days before I will finish it, hopefully :)

Thursday, November 10, 2011

November Give Away


It's that time again.... Give Away time! I may just do one each month...pretty ambitious, huh?

For this one I am not giving away a pattern. It is an actual finished product. Remember the lavender mitts I started a few days ago? for my niece? Well, they are a touch too big for her little bitty hands. She tried them on and didn't say anything, but I thought they looked a little too big. This design is supposed to cling to the hands. Now I am making her another pair.

Anyway, I thought about what I could do with the mitts. They are still too small for a teen, but too large for an 8 or 9 year old. I think they would fit a 10, 11, or 12 year pretty well. They measure 6 inches in circumference and 6 inches long. I do not have any family members that could use these. All of my nieces, and daughter are either to small or too old for these to fit.

I thought about putting them in my Etsy shop. Then decided no...they may not sell. I've had really great weeks and then go weeks without selling anything. Sooooo like I told my sister...

Etsy, Shmetsy... I am WaY more successful at giving things away than I am at selling :) Not good, huh? Oh well... I love to give. It makes me happy.

So if you have a 10-12yr old daughter, niece, sis, or friend:

Just leave me a comment here, Follow my blog and you will be entered to win. In one week I will randomly choose a winner and announce the winner in a new post.

I'll mail these mitts to you... totally free. I'll cover shipping and everything.
I know many of you are great crocheters and or knitters, but with the giving season upon us I thought you may want them to help out with your own giving.

Made by me in a smoke and pet free home.
Only tried on once.

Check back in a week...you could be the winner!


Tuesday, November 8, 2011

Rip Rip Rip


I wanted to show the progress on my ripple blanket.
I added 7 rows: white, green, and yellow
Then I hated it.

I left it lying on the top of a bookcase beside my bed for about 3 days. I kept looking at it thinking about the colors. To me it just didn't feel right. Do you ever have a project that you start and get stuck on because something just doesn't feel right?

Well I decided I did not like the first three colors together. So I ripped, ripped, and ripped. Not rippled.....ripped. I ripped out 11 rows; 4 colors.

I have no problem ripping out rows or rounds on projects. I want my projects to be perfect, and if I feel something is just not right... then I will dwell on it until I can think of a solution...and then it's coming out. Anyone that ever sees me do this will visibly cringe. They will say 'WHat ArE YoU DoInG!?!' I don't cringe. I actually feel better because I know I will redo it again.
So my solution was to go to the store and get more colors. UUUGggh, I tried to use what was in my stash...but that just didn't work. I did not have the perfect colors. Now I think I do. we will see.

I took out a row of the blue (turquoise) and added a lighter blue beside it. I think it looks much better. The original blue and orange really go together better now.


The colors look a little wacky. It is so hard to photograph red and orange. Photoshop helps some. The yellow is not quite as bright as it looks in the photos.
My next colors will be pink and purple. I really hope that I like them. I do not want to buy more yarn. My house can not take much more. It is everywhere... bedroom, living room, purse, closet, bookcase, armoire (?) I'm definitely an OCD crocheter when it comes to color.


Sunday, November 6, 2011

Instructions for the Brite Baby Ripple

As I was reading comments this morning I remembered that someone requested the pattern for the baby ripple. So sorry to Heather... please forgive me for taking so long.

I think I mentioned in the original post about giving this blankie away already. Because of this, I will try my best to write it down from memory and from the photos. It is really simple. I can not take credit for the ripple stitch design. You can find the Neat Ripple pattern here.

I am trying to remember the number of chains that I started with, but I'm sorry to say that I can not remember. So I'll use my measurements instead. (Of course, you can make any size you like)

Materials:
Size G or H crochet hook (if you crochet loosely use the G, tightly use H)
Carons Simply Soft in Pink, Orange, White, and Green (bright shades) I think I used a little over 1 skein of Pink and 1 skein each of the other colors
Yarn needle

Measurements:
32 inches (81 cm) wide
32 inches (81 cm) in height

Pattern

Starting with Pink, begin the Neat Ripple pattern

The following is directly from Attic 24 blog, but I have translated into US terms

To begin, chain multiples of 14, plus 3 for turning.

ROW 1

1 dc into 4th chain from hook

1 dc into each of next 4 chs

dc2tog

dc2tog

1 dc into each of next 4 chs

*2 dc into next ch

2 dc into next ch

1 dc into each of next 4 chs

dc2tog

dc2tog

1 dc into each of next 4 chs*

Repeat between ** ending last rep with 2 dc into last chain, turn.

ROW 2

ch3, 1 dc into same stitch,

1 dc into each of next 4 sts

dc2tog

dc2tog

1 dc into each of next 4 sts

*2 dc into next st

2 dc into next st

1 dc into each of next 4 sts

dc2tog

dc2tog

1 dc into each of next 4 sts*

Repeat between ** ending last rep with 2 dc into the top chain of the chain-3 from previous row.

Repeat row 2 for length required.


Now follow the color sequence below

3 rows of Pink
2 rows orange
1 row white

3 rows green
2 rows pink
1 row orange

3 rows white
2 rows green
1 row pink

3 rows orange
2 rows white
1 row green

3 rows pink
2 rows orange
1 row white

3 rows green
2 rows pink
1 row orange

3 rows white
2 rows green
1 row pink

3 rows orange
2 rows white
1 row green
3 rows pink

If you have any questions about the ripple part of the pattern, Lucy at Attic24 offers a photo tutorial on her blog. Just click on the link above.

Finish off and weave all of those ends :)


Thursday, November 3, 2011

New Projects

I finally decided to start a new project...well several new projects. I have been wanting to make a colorful ripple all for myself. It seems that every single thing that I make goes to someone else. It is so hard to keep things for myself... I love to give to others in my family all the time. But not this time, I have decided that this ripple is definitely gonna be all mine (probably, definitely :)).


I've been eyeballing this ripple for a while now. It is absolutely gorgeous...I look at it several times a day...that is stalking...i know. I haven't gotten very far, but I know that I will finish it eventually. I've been working on it at night in the bed. I like to watch Tv before bed at night...so now I have a project that I can take to bed with me while watching HGTV. Usually I study my signs (American Sign Language... studying for a year now), but now I'll be working on the ripple. I'll try to update my progress on this weekly


I'm also working on these mitts for my niece. She requested a pair in light purple. I have made several pairs from this pattern and actually kept a pair in black for myself. They are soooo comfortable and rather stretchy for crochet. I found the pattern here on Crochet Me designed by Julia Vaconsin.

These are for a 9 year old so I changed the hook size from an H to an F and used sport weight yarn (Plymouth Baby) instead of worsted.


And Finally... this is a sneak peek of my new PIP (pattern in progress)... I got this mohair blend yarn at my LYS for a great deal and decided to make a garment...I'm not telling what it is yet...I'm hoping to finish in a few days and offer the pattern here for FREE!!! All I can say is, it is not a hat, scarf, mitten, or cowl pattern.


Tuesday, November 1, 2011

Tip: Head and Hat Measurements


After posting the pattern for the Owl Hat I have received numerous comments on here and Ravelry asking how to make one in a larger size. So this has given me the idea to offer a tip on how to help with this dilemma.

I had already given the hat away as a gift so I couldn't expand on the size. I didn't even have the gauge to post. A comment from AbyBay prompted me to search out a chart with hat/ head sizes. AbyBay generously offered to send me a chart that she uses.

The chart does not tell you how many stitches or rounds to crochet but it will give you a general idea about how large you should make the hat.

So now when making a hat, no matter how loosely or tightly you crochet, or how bad you blow the gauge...you can still come up with the right size hat.

I found a great chart here
It is the most detailed chart that I've seen. I think it's my favorite.

I found the chart below on Crochet Geek here, and here it is:

Newborn

Head Circumference 13" - 14 "

Hat Circumference = 11.5" - 13"

Hat height = 5.5 to 6"


3 to 6 months

Head Circumference: 14" - 17 "

Hat height= 6.5 - 7"


6 to 12 months

Head Circumference: 16" - 19 "

Hat height = 7.5"


Toddler -12 months - 3 years

Hat height = 8"

Head Circumference: 18" to 20 "


Child - 3 - 10 years

Hat height =8.5"

Head Circumference: 19" - 20 1/2"


Teens

Hat height 9-10"

Head Circumference: 20 1/2" - 22"

Adult Woman

Head Circumference: 21.5" - 22.5"


Adult Man

Head Circumference: 23" - 24"


Edit: I found another chart here at Woolly Wormhead (mostly about knitted hats) that I am currently using. I really like this one, but the measurements are slightly different from the other one I found. Probably due to the differences in stretch between knit and crochet. Try both and see which you prefer


To Fit

Preemie

Newborn

6mth
(Baby)

12mth
(Toddler)

Child or
Teenager

Adult

Large
Adult

Circumference

inches

12

14

16

18

20

22

24

cm's

30.5

35.5

40.5

45.5

50.5

56

61

Length (crown to base of ear)

inches

4.25

5

5.75

6.5

7.25

8.25

9.25

cm's

11

12.5

14.5

16.5

18.5

21

23.5