Saturday, January 21, 2012

Just Another Sock Monkey Hat Pattern


I've been wanting to post all week about how interesting my life is and all the interesting things that I do, not related to crochet. But I realized something...my life is pretty boring. I don't have a lot to blog about. I'm on Twitter and all I talk about is crochet. I seriously need a life I guess :D
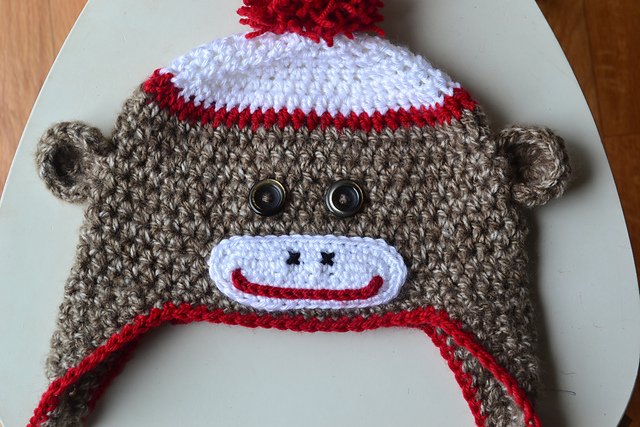

With that in mind, I decided to post my Sock Monkey hat pattern. I've used other patterns to make these hats and they all turned out great. However, this time I decided to make this hat with a totally new pattern. I like my own little shortcuts and ways of doing things.


Materials
1 skein Bulky weight yarn (I used Lion Brand Jiffy yarn in Camel Spray)
Red, White, and a tiny amount of black yarn
Size H & I crochet hooks
Yarn needle
2 buttons

Size
The size in the photo will fit a 4-12 year old
This pattern is easily altered to fit any size
I used bulky weight. If you choose to use worsted weight then you'll end up with a toddler or baby sized hat

I forgot to get the gauge before I mailed it out, but I did crochet a little tightly. If you crochet more loosely, the hat will fit an adult.

Pattern

With I hook and white, Ch 3

Rnd 1: 7 hdc in 3rd ch from hook (which is the 1st ch made) Join with sl st to the top of first st. (8 hdc)

Rnd 2: Ch 2 (counts as first st here and throughout). Hdc in same st. 2 hdc in each st around. Join with sl st. (16 hdc)

Rnd 3: Ch 2. Hdc in same st, hdc in next st. (2 hdc in next st, hdc in next st) around. Join with sl st. (24 hdc).

Rnd 4: Ch 2, hdc in same st, hdc in next 2 sts. (2 hdc in next st, hdc in next 2 sts) around. Join with sl st. (32 hdc).

Rnd 5: Ch 2, hdc in same st, hdc in next 3 sts. (2 hdc in next st, hdc in next 3 sts) around. Join. (40 hdc).

Rnd 6: Ch 2, hdc in same st, hdc in next 4 sts. (2 hdc in next st, hdc in next 4 sts) around.
Join. (48 hdc).

Rnd 7: Ch 2, hdc in same st, hdc in next 5 sts. (2 hdc in next st, hdc in next 5 sts) around. Join. Finish off. (56 sts).

Rnd 8: Using the red, attach with sl st and ch 2. Hdc in next st and each st around. Finish off.

Rnd 9: Using the camel, attach with sl st and ch 2. Hdc in next st and each st around. Join with sl st.

Rnds 10-17: Ch 2, hdc in each st around, join with sl st. Do not finish off.

Earflap

Ch 1, sc in same st and in next 10 sts, turn (11 sc)

Ch 1, sc2tog, sc in next 9 sts, turn (10 sc)

Ch 1, sc2tog, sc in next 8 sts, turn (9 sc)

Repeat this method of decreases until you end with one stitch, finish off.

2nd earflap

Holding the hat with the right side facing skip 17 sts from the first row of the earflap just made.

Attach with sl st and ch 1. Sc in same st and in the next 10 sts, turn. (11 sc).

Work this earflap the same as the first, but do not finish off when you finish the last row.

You will work a sc round all the way around the hat. Evenly place 11 sc in the sides of each earflap and 3 sc in each corner. Finish off.

In any corner, attach with red yarn leaving a long enough tail to use as part of the braid. Work a row of sc all the way around the hat. Remember to place 3 scs in each corner. Finish off, leaving a long enough tail to use as part of the braid. (I love ways to eliminate weaving ends)

Mouth
Ch 14
Rnd 1: Sc in 2nd ch from hook, sc in next 11 ch, 3 sc in last ch. Working in the other side of chain, sc in next 11 ch. 2sc in the last ch. Do not join.
Rnd 2: 2 sc in the first st, sc in the next 11, 2 sc in each of the next 3 sts. sc in next 12 sts. 2 sc in next st, do not join.
Rnd 3: 2 sc in first st, sc in next 14 sts. 2 sc in next 3 sts, sc in next 14 sts. 2 sc in next sts, sc in last st.
Using my favorite special finishing, leaving a tail long enough for sewing. (Refer to the chunky hat tutorial for the finishing)

Ears
Change to H hook and hold 2 strands of the camel spray together. Crochet tightly

Ch 3
Row 1: 7 Hdc in the 3rd ch from hook, turn. (8 hdc)
Row 2: Ch 2, Hdc in first st, 2 hdc in each st. (16 hdc)
Finish off leaving a tail long enough for sewing


Braids
Cut Nine strands for each side. You should already have 1 strand (the beginning and ending tails) for one side


Make a pom pom and sew onto the top of the hat.

Using photos for reference, sew the eyes and mouth onto the hat. When sewing, only sew through the top layer of the stitches on the hat so the back will look nice and neat.


Using the red, sl st the smile onto the mouth piece. I played around with it a few times to make it look the way I wanted. I did this after everything was sewn into place. I tucked each of the tail ends into the underside of the hat into the camel. (If you don't like this method you can always sew a smile with a yarn needle. The photos of Ireland wearing the hat have a smile sewn this way. I later took it out and used slip stitches to make it look smooth and neat)


As always, you can leave me a comment or send me a message if you need help. I wrote this up pretty fast so there may be mistakes. I hope not, but feel free to let me know. I check messages a couple times each day.

Enjoy!

Monday, January 16, 2012

Chunky Beanie Pattern


Well, I made a trip to the Post office this morning to mail out the hats from the giveaway. Sure enough, the USPS is closed today due to the holiday. I do this every single time they are closed. It seems like I always have orders to mail out on holidays. Anyway this worked out well, because I had the chance to take more photos.


Materials

One skein Chunky or Bulky 5 weight yarn (I used Patons Shetland Chunky in Oxford Grey)
For the magenta round I used a small amount left over from my Isar scarf
Size I (5.5mm) crochet hook
Yarn needle

One size fits most

Pattern

Ch 3

Rnd 1: 7 hdc in 3rd ch from hook (which is the 1st ch made) Join with sl st to the top of first st. (8 hdc)

Rnd 2: Ch 2 (counts as first st here and throughout). Hdc in same st. 2 hdc in each st around. Join with sl st. (16 hdc)

Rnd 3: Ch 2. Hdc in same st, hdc in next st. (2 hdc in next st, hdc in next st) around. Join with sl st. (24 hdc).

Rnd 4: Ch 2, hdc in same st, hdc in next 2 sts. (2 hdc in next st, hdc in next 2 sts) around. Join with sl st. (32 hdc).

Rnd 5: Ch 2, hdc in same st, hdc in next 3 sts. (2 hdc in next st, hdc in next 3 sts) around. Join. (40 hdc).

Rnd 6: Ch 2, hdc in same st, hdc in next 4 sts. (2 hdc in next st, hdc in next 4 sts) around.
Join. (48 hdc).

Rnd 7: Ch 2, hdc in same st, hdc in next 5 sts. (2 hdc in next st, hdc in next 5 sts) around. Join. (56 sts).

Rnd 8 - 15. Ch 2, hdc in each st around. Join.

Rnd 16: Ch 2, hdc in the back loop only in each st around. Join and finish off.

For the magenta rnd you will work around the post of each hdc of rnd 16.

Attach with sl st and work a sl st around each post. You will insert the hook from the front and go under like you are working a front post stitch. When you make it around to the last stitch, cut the yarn.

The following photos will show you how to finish off. I like to use this special finishing all the time. It eliminates the need for a knot. I hate using knots in crochet. Most of the time they are not necessary.

When you get to the last sl st pull the tail up through the top of the stitch.


Now take your hook and slide it under the first sl st and pull the tail all the way through


Take the hook and place it up through the center of the last sl st


Take the tail and pull down into the center of the last sl st. You end up with a seamless finish. Cool, huh?


Years ago a lady taught me lots of shortcuts and tips when crocheting. I use this tip all the time.

Enjoy!!!

Sunday, January 15, 2012

Winners for the January Giveaway

I'm so excited today. I love announcing winners of my giveaways. Today we have two. One for a beanie hat...


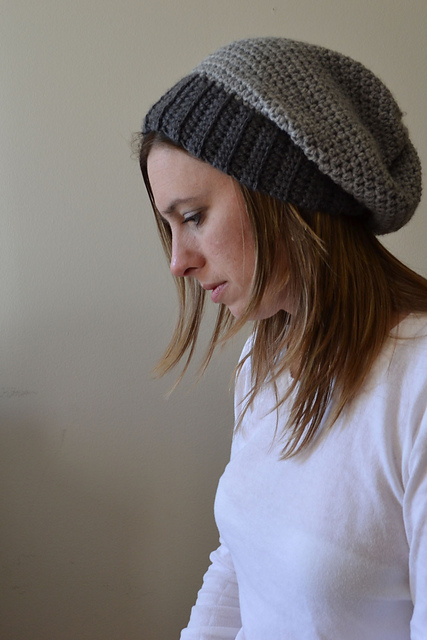
and another winner for this slouchie hat


I split the names into two lists, numbered them, and then used Random.org to randomly determine the winners.

The winner for the beanie is:

Pacas !!!

and the winner for the slouchie is:

Sam !!!

Congrats to both of you! Now all you have to do is send me your mailing address and I'll put these in the mail tomorrow.

Ok... I have more business to discuss:D

I finally broke down and did it!
I joined twitter. I kept saying that I would eventually get around to it and finally I did. So now you can find me there too.

More business... and I think you'll like this better.

A few weeks ago I got an order for a sock monkey hat. I mailed it out and then one day last week I realized something. I screwed up. Imagine that! I forgot to sew the ears on the hat before mailing it to the little girl. I felt sooo bad, because the ears make the hat. It just wasn't complete. So I contacted the mother of the little girl and offered to make her another hat for free in a different color.

I used my own pattern, that I am currently writing out. It is really easy and I hope to offer it soon.


A few weeks ago I put up a poll asking what kind of critter hat would you like to make most and of course the majority chose "other". I'm hoping "other" meant sock monkey...tehe

Here's my little monkey modeling and acting crazy


Congrats to the winners and check back for the beanie pattern And the Sock Monkey pattern!

Monday, January 9, 2012

Finally...My Finished Cardi...Almost

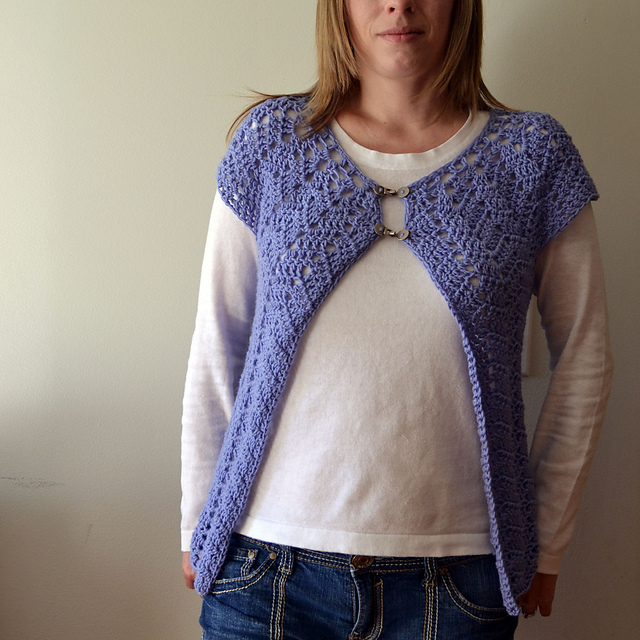
A couple of months ago I made this cute cardi for me:) After some motivation from Janette over at The Green Dragonfly, I finally took some photos of mine.


I found the right buttons/ closure thingies at my LYS and took these pics. I need to redo one of the closies...it's pretty darn crooked.


Overall, I'm really happy with it. I used Debbie Bliss Baby Cashmerino and I love it. I think it looks better with a tank instead of long sleeves.


The photo is not so great but you get the idea.

You can find the Free pattern here. It's an easy and versatile garment to make. I finished this in 2 nights (minus finding the buttons and sewing them on)

Right now I'm having a giveaway, so go to my previous post and leave a comment to enter to win. I'm giving away two hats...probably this Sunday.

Have a wonderful week:)

Friday, January 6, 2012

January Giveaway

It's that time again...Give Away Time!!! This month I am giving away a finished project or two. These are my favorite posts...I loooove giving. So here you go...


I love this slouchy hat. It seems the color grey is everywhere right now. I have tons of grey yarn and decided to make a slouchy hat. It is my own design (that I haven't written out yet) and I love the way it fits. Not very bright and colorful, but sometimes we need a neutral to wear.


Now, I know a lot of people do not wear slouchies so I have another one for ya! It's a beanie...made out of a chunky grey. I have tons of this grey also so I decided to include one of these in the giveaway as well. Another neutral, but I did add a magenta row at the edge to give it a little color.


There will be two winners! Just leave me a comment and let me know which one you prefer...slouchie or beanie. In about a week (next weekend) I will randomly choose one winner for each.


Please disregard the face in the photos. Too lazy to add makeup and photoshop to make more presentable...haha

Oh...I almost forgot... I'll post the pattern for the beanie in a couple of days. It's so so easy. And a super fast instant gratification project.

Tuesday, January 3, 2012

Another Year Goes Bye Bye

I have to say that I am happy to see 2011 go. It was a tough one. I hope 2012 is better...not trying to sound negative...I just have high hopes for this new year. I have been searching for a new job for what seems like forever now. I have to believe that something will come my way pretty soon. We also recently started looking for new homes two hours away, and graduate classes are starting next week. It sounds like it's gonna be a busy 2012, but I welcome the change. I need the change.

One of the good things, no...great things about 2011 is this blog. I am so happy that I started this little journal of mine. I have wanted to for so long. I love looking back at photos of the past and now I can also look back at the projects that I've finished.

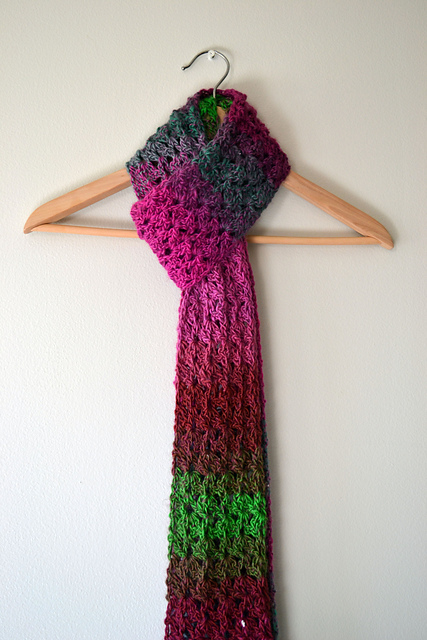
These are my latest completed projects. The Isar scarf and Puff stitch scarf are now complete. The last of 2011. I'm loving the Isar...been wearing it every day. My aunt loved it and I made her one in the exact same colors. So technically, her scarf was the last completed project of 2011.


I would have modeled it but I was feeling pretty lazy. I didn't feel like setting up the tripod and putting on makeup:)
Here is the finished Puff Stitch Scarf. It turned out thick and warm. Lovin it too.


As you can see I still didn't feel like putting makeup on and posing:) (the hanger looks prettier than me at the moment)


I hope to have many more projects for 2012...and many more patterns to share. I love connecting with all of you and reading your comments and your blogs too. I have no crafty friends here in my physical world so seeing all of your projects makes me feel like I'm not the only person in the world who has an obsession with yarn, hooks, and needles. I'm not as weird as I thought.

Thanks to all my new crochet/ knitting buddies who take the time to visit me and comment. I hope 2012 is a great year for all of us:)

I almost forgot... it's a new month as well and that means giveaway. Check back here in a couple of days. I'll be posting about the giveaway for January. This month I'll be giving away an actual item, not a pattern.